

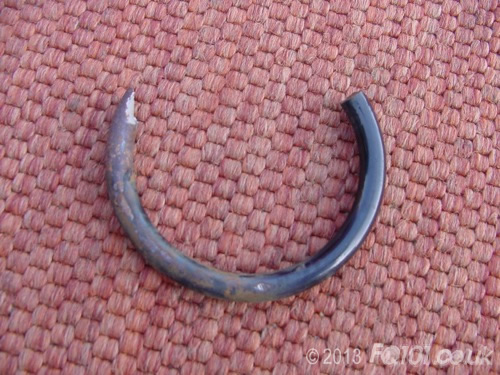
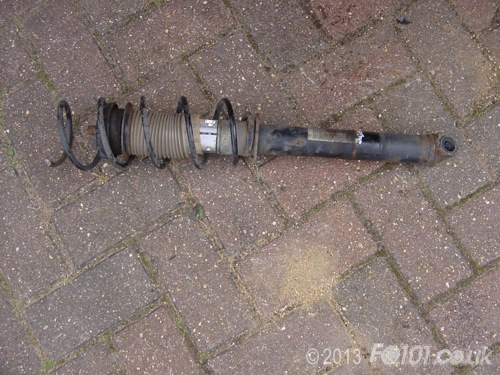
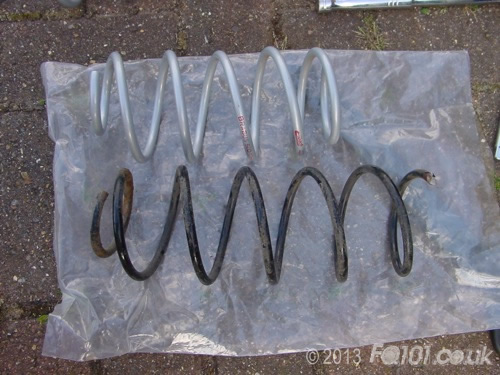
The fortwo 450s are prone to failing front suspension coil springs. Failure almost always happens at the ends of the springs where the spring comes into contact with the carrier. One theory is that the springs were scratched during original installation which has allowed corrosion to set in and weaken the spring. Another theory is that the springs are made from poor quality steel. Either way, when a spring fails it can be terrifying for the driver, especially if it happens at speed! (They fail with a very loud bang). Here is what broke off one of our cars:
If a spring fails at the top, you can limp home fairly safely. Don't do any heavy cornering.
If a spring fails at the bottom, you may have problems. The spring may want to slide down the suspension arm and jam into the tyre or brake disc. In this situation, we recommend you don't drive home. A brakedown truck is the best solution as you don't want to roll the front wheels with a tow.
The guide is only applicable for a fortwo 450 mk5, mk6 or mk7. Earlier fortwos have transverse leaf springs.
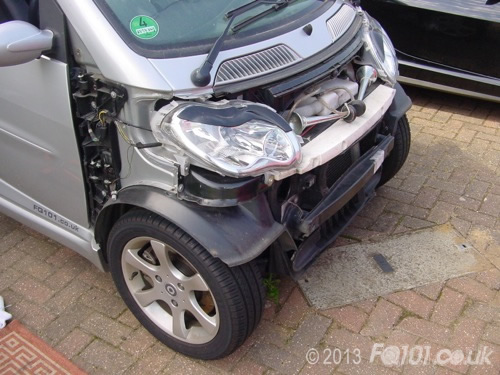
Remove the headlight cluster over the failed spring.
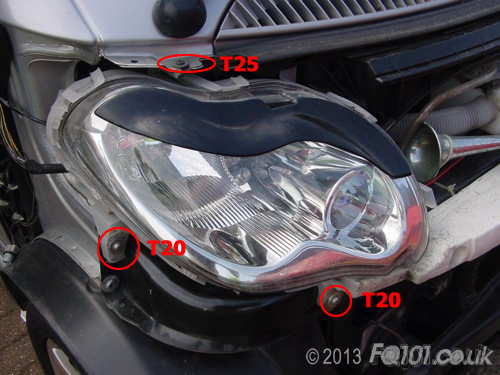
The 'peanut' headlights on the mk6 and mk7 are removed as shown in the following picture. The 'almond' shaped lights on the mk5 have hex bolts in place of the T20 screws.
Disconnect the wiring from the back of the light cluster to remove it.
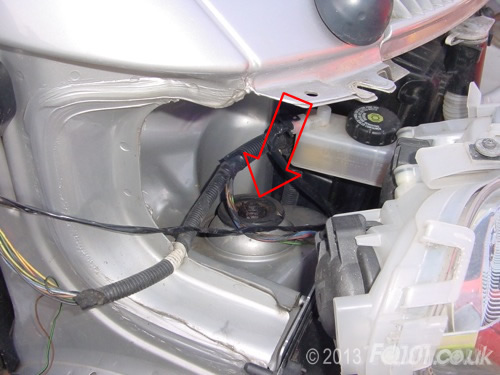
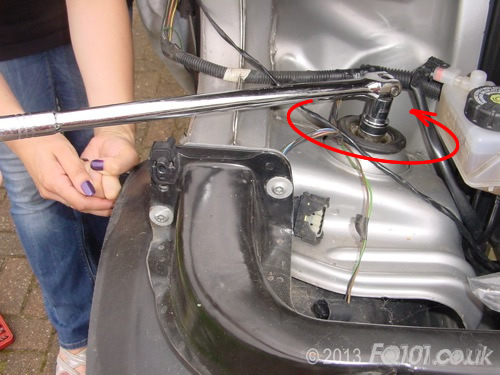
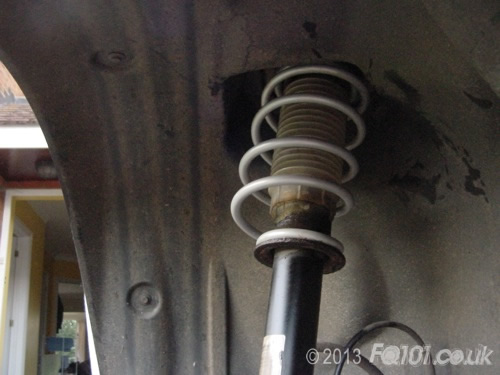
You can now get to the suspension top mount (arrowed):
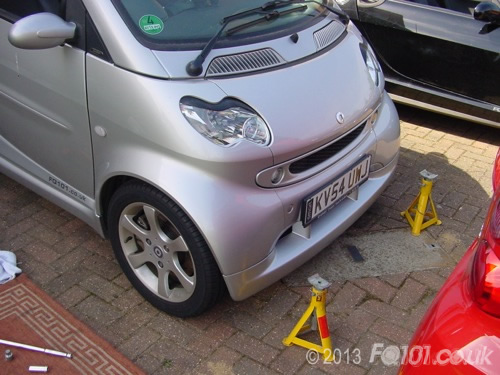
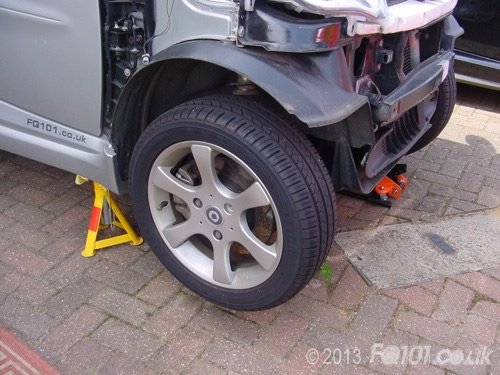
Slacken off the wheel bolts, jack up the car and remove the wheel. If you are using axle stands, do not use the wishbones as you need these to be free moving.
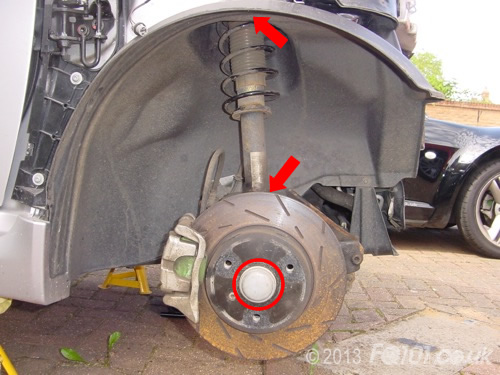
The suspension arm is fixed at the top mount position; there is a strap to to the back of the hub assembly (bottom arrow); and a hub bolt (circled) holds the wheel bearing, hub, hub assembly to the bottom of the shock.
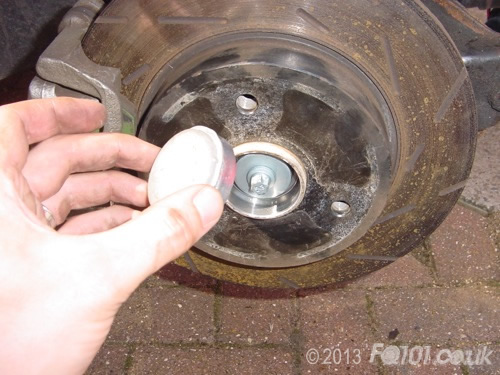
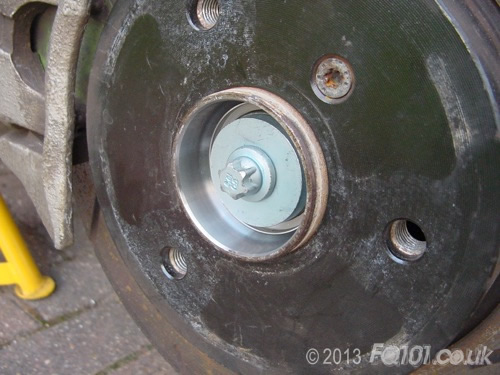
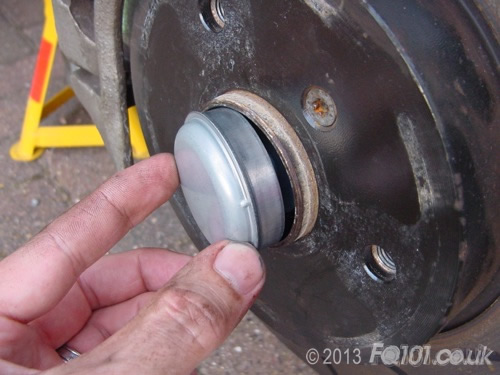
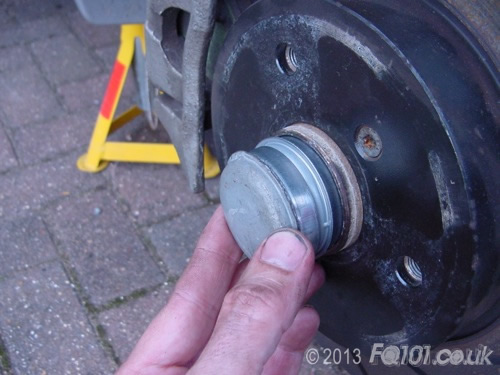
Remvoe the hub dust cover. They are very pliable so you may wish to replace these with new. You can reuse these by removing them carefully. Using an old screwdriver and a hammer, gently tap around the edge of the cover. It will gradually come away from the hub.
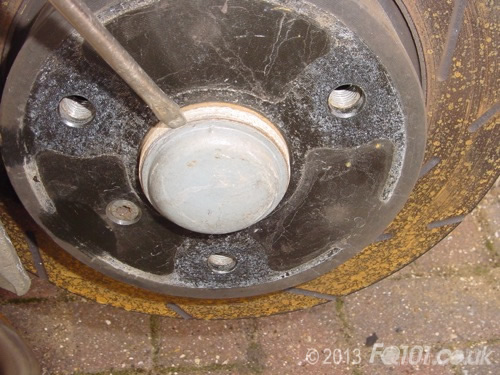
Remove the cover cap to reveal the hub bolt.
Back to the top mount...
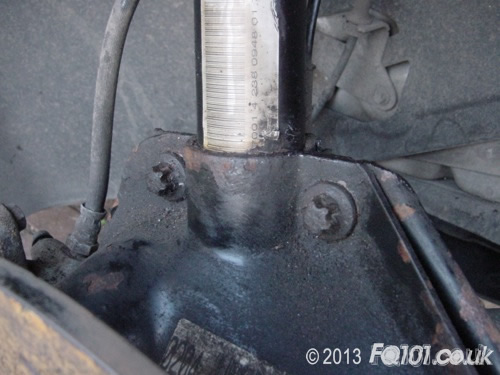
It is good practice to ensure that the exposed nut and stud are always generously smothered in grease to stop them rusting and fusing together. If these aren't greased when you come to remove the suspension, soak in liquid Plusgas for at least 6 hours.
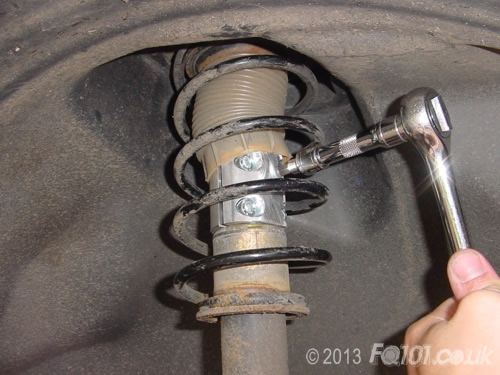
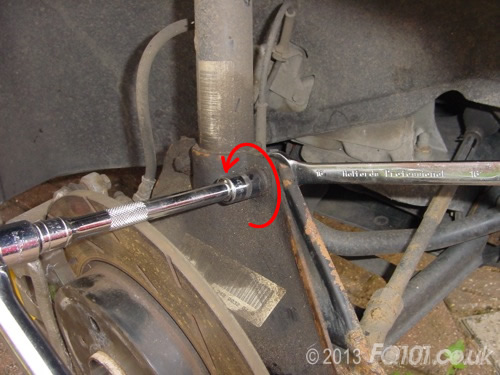
To remove the top mount, the stud needs to be 'held' with a T45 bit whilst the nut is loosened with a long reach 21mm ring spanner. If the stud isn't held, attempting to loosen the nut will simply turn the whole shock assembly. The image below is illustrative only - you will never get enough leverage with a small angled-tool.

In many cases, the above method will not work and the socket in the top of the stud will round off. However, we recommend trying this method first before you revert to plan 'B'.
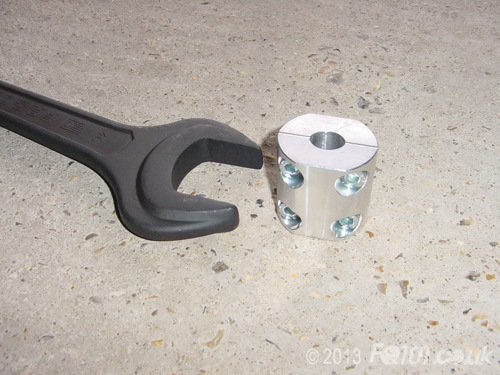
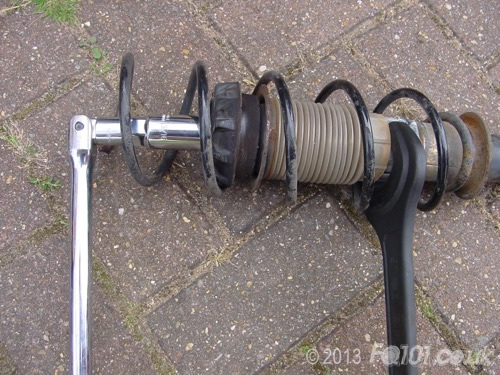
Plan 'B' requires the services of a 46mm spanner and a shock absorber shaft clamp.
The clamp is designed in 2 sectinos which bolt together.
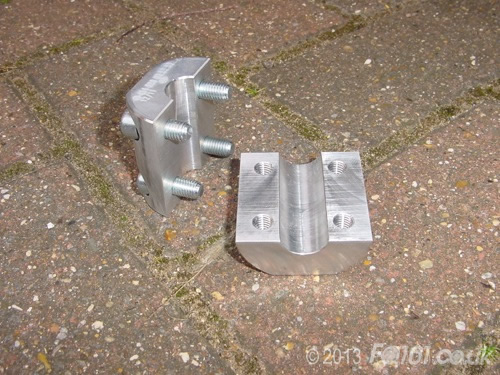
To fit the clamp, you need to slide up the plastic guard as shown below:
Fit both sides of the clamp and bolt together. Ensure all bolts are tightened up the same.
You can now hold the shaft with the spanner.
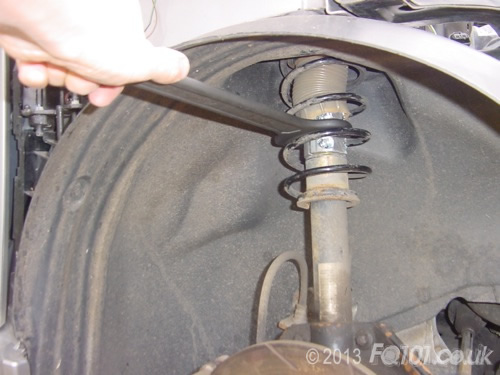
With an assistant holding the spanner, use a 21mm socket on a long breaker bar. This should now give you enough leverage to remove the nut.
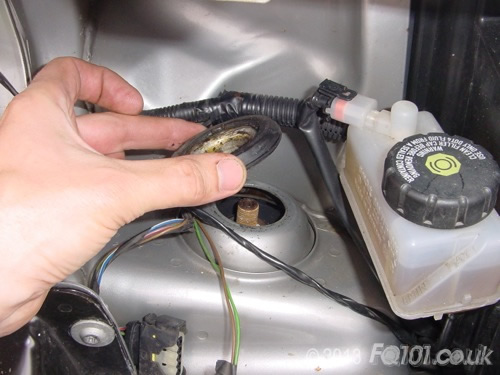
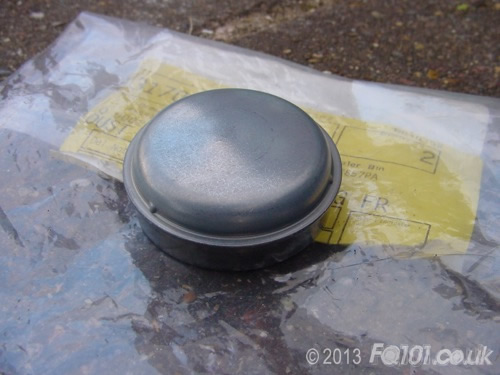
Remove the top mount cover cap.
Remove the suspension arm strap with an E14 socket. You will need to hold the nut on the back with a 16mm spanner.
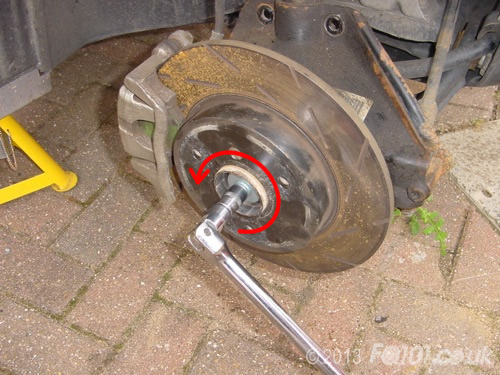
Remove the hub bolt with an E14 socket. This will need a fair bit of a force to remove this stretch bolt. Ideally, you should replace this bolt when it comes to reassembly.
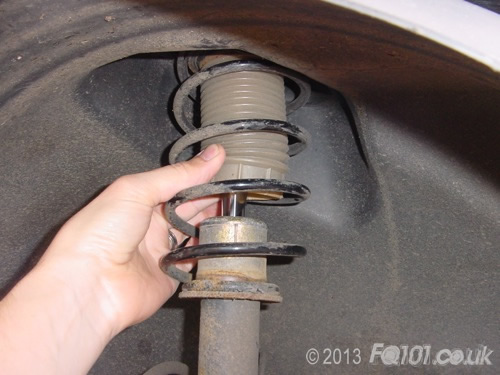
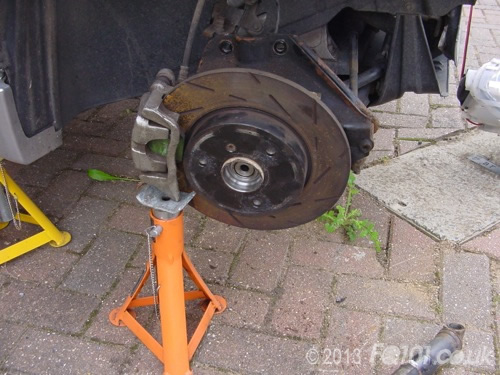
Now holding the hub, pull the lower end of the suspension arm out of the back. The whole arm should now be free to remove from the car. You can see where the broken sping has extended beyond the top carrier.
Use a spare axle stand to hold the hub whilst you work on the suspension arm.
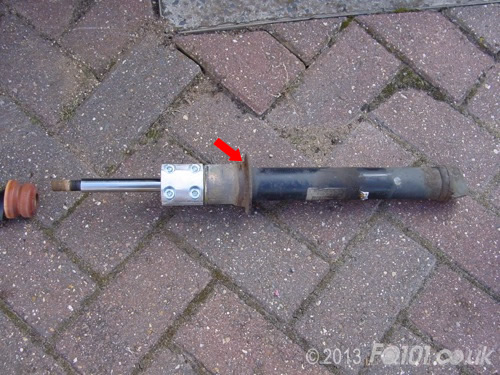
Using the shaft clamp and spanner, hold the suspension shock while you remove the inner nut. Due to the length of the stud, you will either need a long reach 21mm socket or ring spanner.
Remove all components from the shaft.
Unfortauntely, there are few pictures to follow as this guide was developed during failing daylight! We will revisit this page and add more guides in due course.
On the bottom spring carrier, you will notice a small locator. The end of the coil spring needs to be touching this locator. However, before you fit it, give the area a good smother in grease to stop rust build up causing the same problem again.
Take you new springs. In this case, we are replacing the standard springs with Brabus ones. If you are replacing with standard springs, you may need a spring compressor.
Fit the bump stop as follows:
Then fit the following components in order:
- Plastic cover shroud
- Coil sping
- Top spring carrier plate
- Small black bearing
- Rubber mount
- Securing nut
Once assembled, check that the lowest end of the spring is in contact with the locator before removing the spring compressors. Fit the repaired suspension arm to the car. and fit the top mount loosely to hold it in place. The spring sits naturally offset as follows:
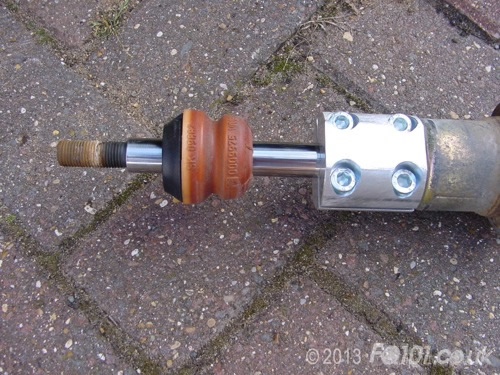
To fit the hub into the suspension arm, lower the hub until it locates in the socket. Then swing the hub up in to place. The bottom of the shock can now by bolted in place with a (new) hub bolt.
Remember to fit the nuts and bolts which hold the clamp.
If you old hub dust covers were damanged during removal, replace them with new.
A handy tip is to use the old cap to tap the new cover into place.
Tighten the top mount up fully and remember to remove the shock clamp before refitting the wheel and lowering the car.


