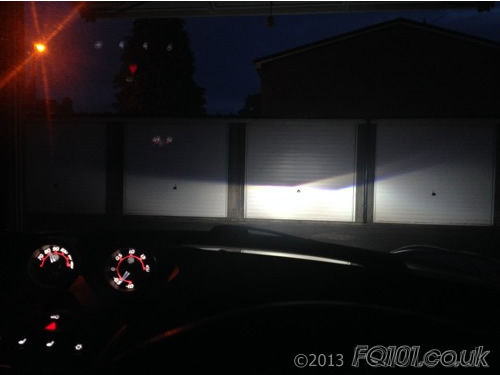
The dipped beam headlights on the smart roadster can be adapted to suit driving on the left or on the right. Further information on this conversion can be found here. To make the conversion whilst the headlight is fitted to the car, follow the following steps.
For right hand drive cars (which drive on the left) the headlight beam angle kicks up on the left as follows. This beam arrangement stops oncoming drivers from being dazzled.
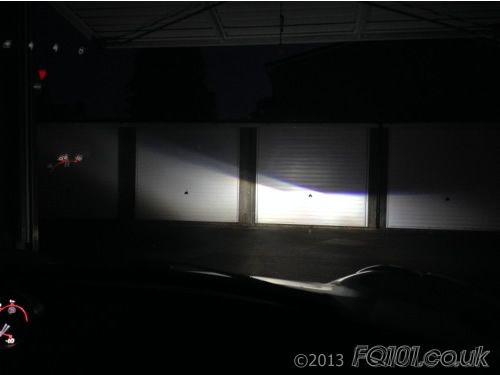
When driving on the other side of the road, it is a good idea to adjust the beam angle to prevent dazzling other road users. Note that both headlights will need to be adjusted in the same way. This guide only shows the process on one side.
Start by removing the headlight cowl. This is secured with two T25 screws located as shown:
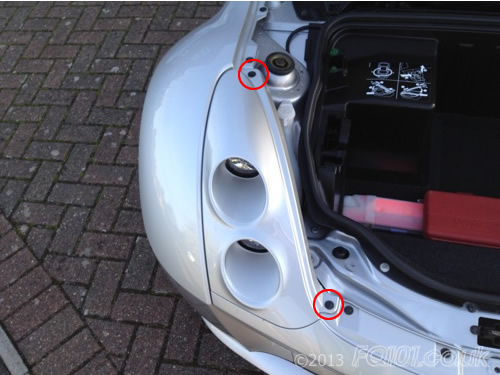
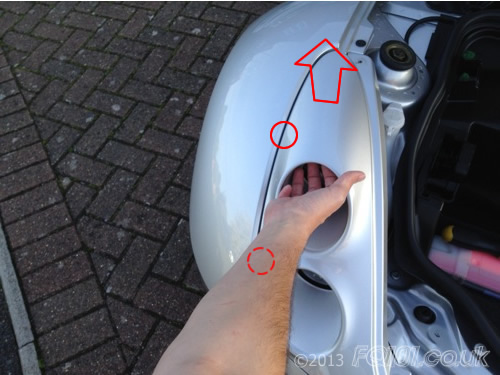
With the screws removed, you lift the top section of the cowl until it begins to unclip.
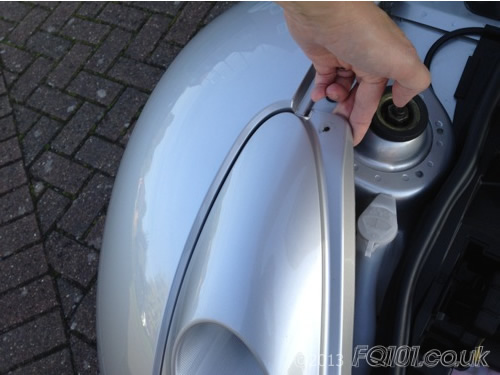
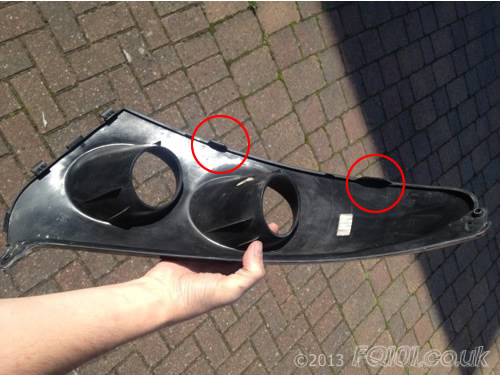
With the top section free, support the cowl as shown and pull upwards sharply. Avoid twisting. You are aiming to release the two clips which are shown circled below. If this the first time you have removed the headlight cowl, you will find the clips are very persistant and need a bit of a tug to overcome!
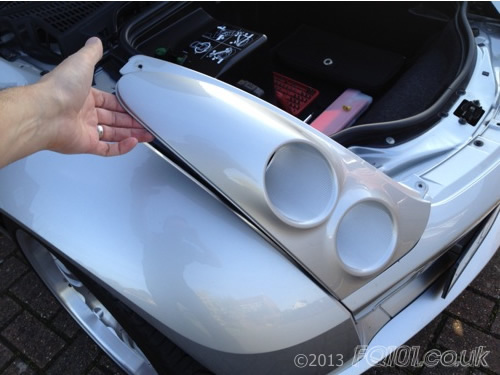
Once unclipped, the cowl will unhook from the lower section.
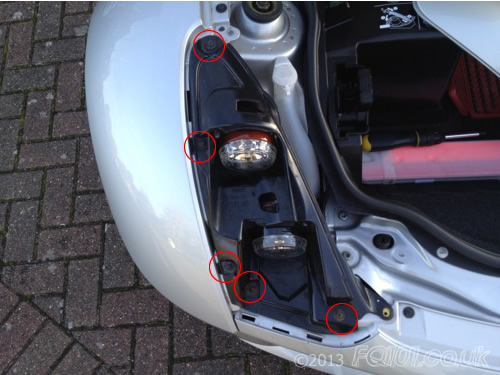
Once released, remvoe the 5No. T25 screws which hold the headlight assembly in place.
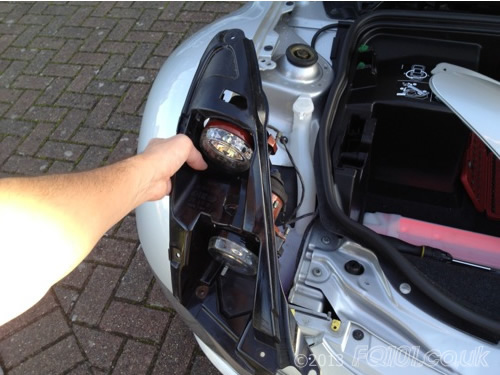
The headlight assembly will be free but the headlight wiring will prevent it from coming completely away from the car.
Look on the back of the dipped beam headlight (lower light of the two). You will see 3No. T25 screws which hold the headlight together.
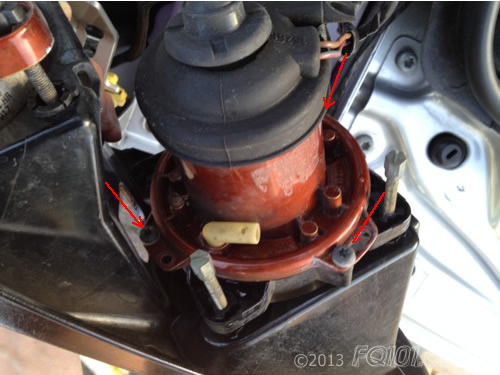
Slacken the two screws with adjustment slots. The screw in the following picture needs to be removed completely.
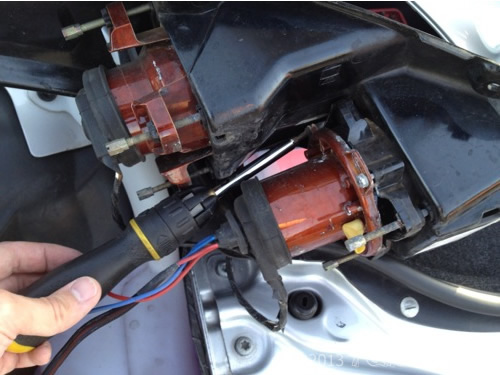
On the underside of the assembly, you will see the position marker. The two screws with adjustment slots need to be slackened enough to allow the marker to move out of its recess. In this position, the marker is set up for driving on the left.
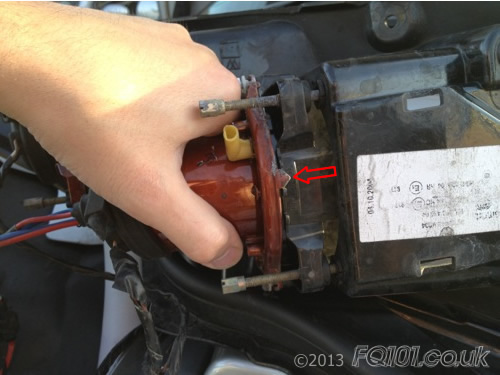
Rotate the light assembly until the marker rests in the other position.
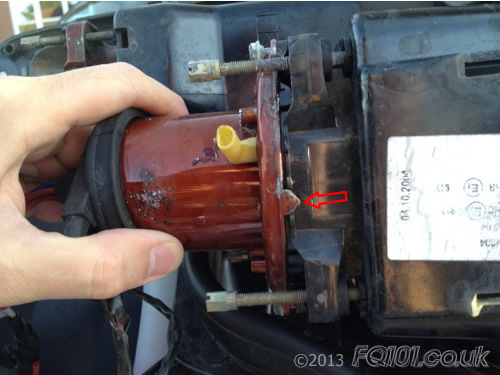
Tighten the two screws on the adjustment slots. Refit the top screw and fit the light assembly back to the car.
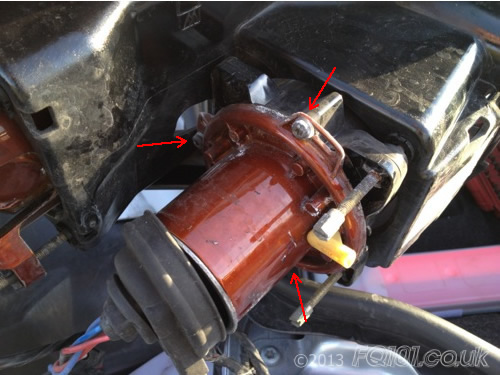
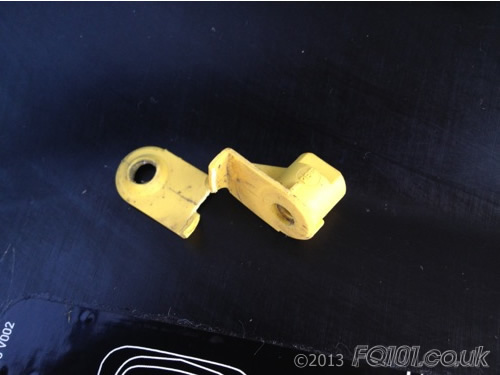
It is quite common for the following yellow clips to break when tightening up the mounting screws. Should you need any spares, more can be ordered from smart with the following part number:
Q001 0676 V000 0000 00 (Easy Clip)
Before refitting the headlight cowls, we recommend modifying the two retaining clips so that they are not as difficult to remove next time you access the headlight. The clips can be seen here:
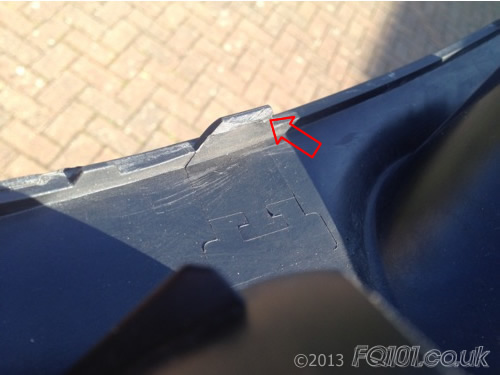
Carefully file down the rounded face of the clip to lower its profile. Don't make it too flat otherwise the clip will not fasten at all.
After repeating the same process for the other headlight, your beam cut off angles will now be ready for driving on the right.
