This is not a job to repeat often! Separating the panels on Roadster is much more complicated compared to a fortwo. The biggest problem we found is that the panels are quite big and awkwardly shaped.
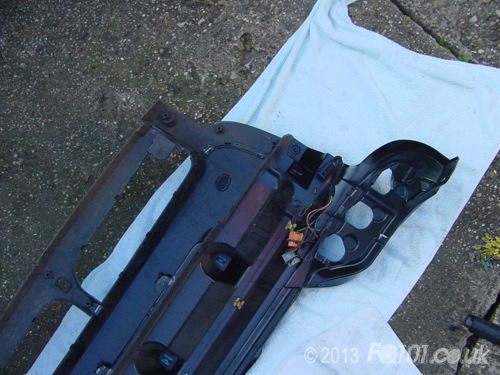
To start, remove the whole back panel assembly using either the roadster or roadster-coupe guide.
We were separating these panels for painting hence why we have only laid the panels on old towels. If you are concerned about your paint finish, use a lot more protection!
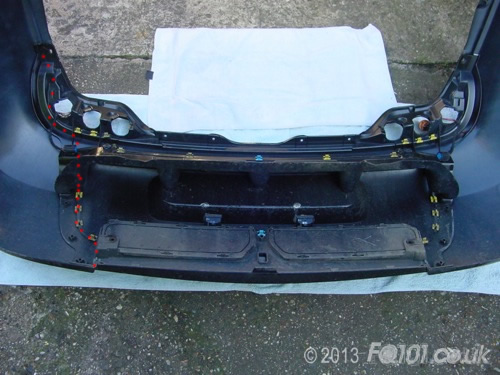
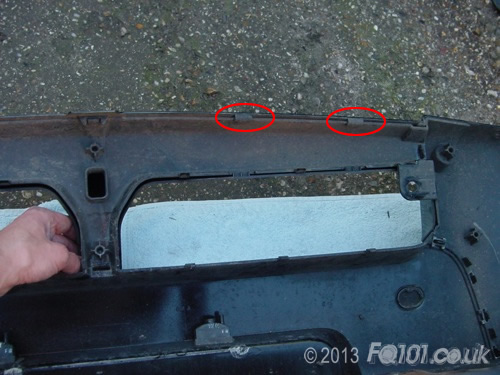
Remove all the panel clips circled below. The sixth one from the right is a common one to miss.
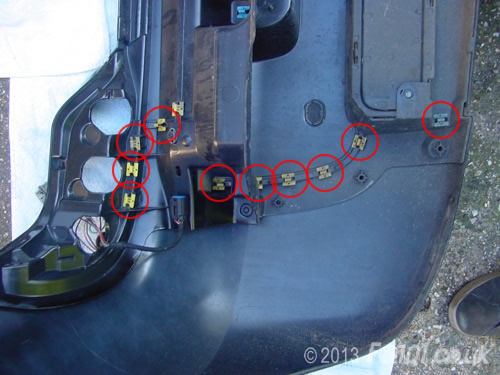
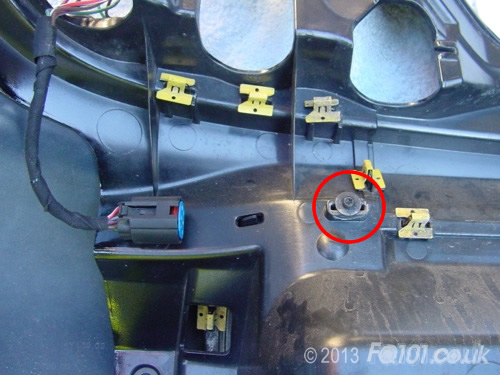
There are also two T25 screws to remove. One is here:
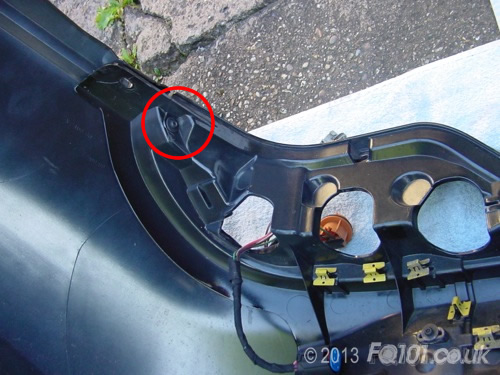
The other is here:
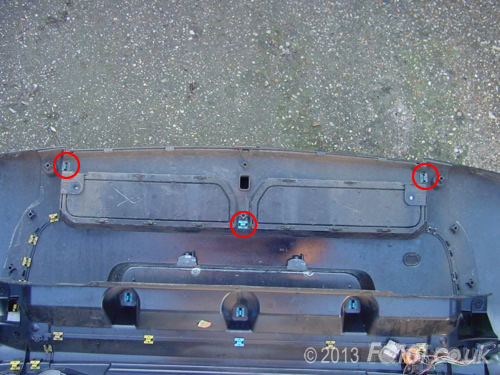
The lower section also needs to be removed. The Brabus version will be slightly different to this standard roadster. Remove the three clips circled.
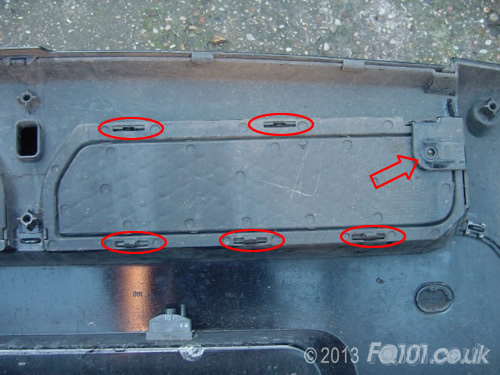
Remove both inserts from the rear section. This can be fiddly. Unclip the lugs circled below from the insert. At the same time, the insert needs to unhook from the section arrowed.
With the inserts removed, the outer panel of the lower section can be removed. Push down as shown and unhook it from the inner trim where circled. Again, this is fiddly and may take a few attempts. Sadly, there is not much flex in the plastic!
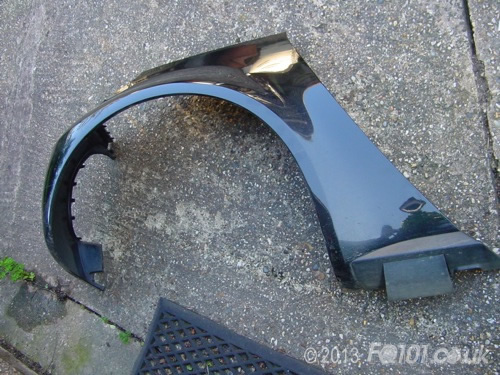
With all clips and the lower section removed, start to separate the panels. This is where we advise having some extra help! Ideally, two people are needed: one to hold each side panel while you separate the sections.
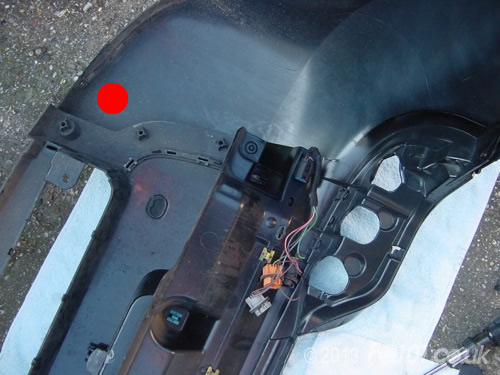
Hold the middle section and push the quarter panel in the bottom corner where the red dot is. Work your way along. You will find a tricky corner around the light cluster!
With a bit of persuasion (and luck!) the panels will separate.