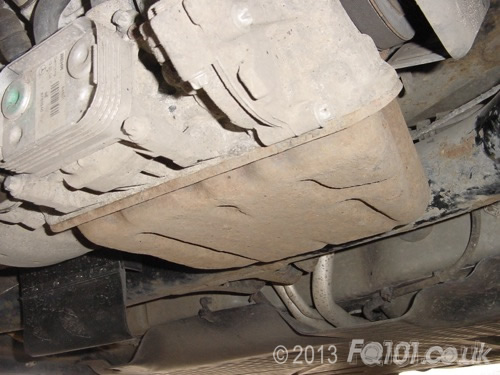
Over time, the sump (or oil pan) will corrode. If the corrosion breaks through, you risk losing all your engine oil over the driveway or on the road, neither of which are preferable. A new sump from smart will cost about £25. There are alternatives available from independent stockists, some of which contain integral drain plugs. However, the advantage that a steel sump has is that it will bend if struck by an object in the road. Although the sump may need to be replaced, it is unlikely to fracture.
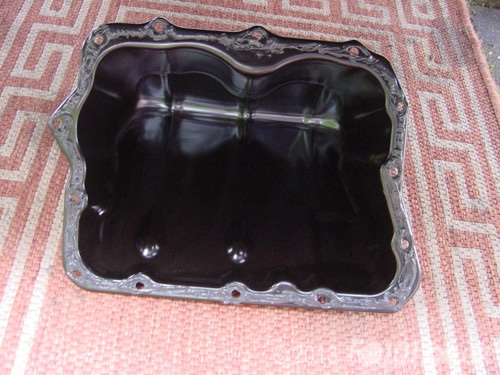
In this guide, we will be replacing the standard sump with a direct replacement. This corrosion was present on a 9 year old car:
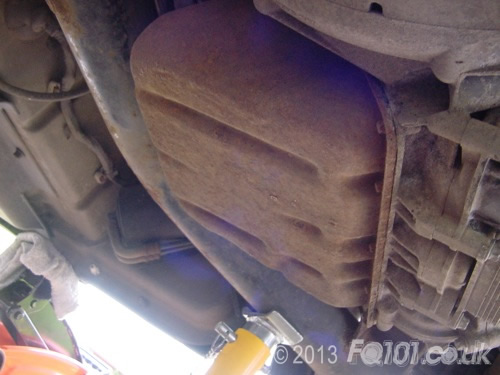
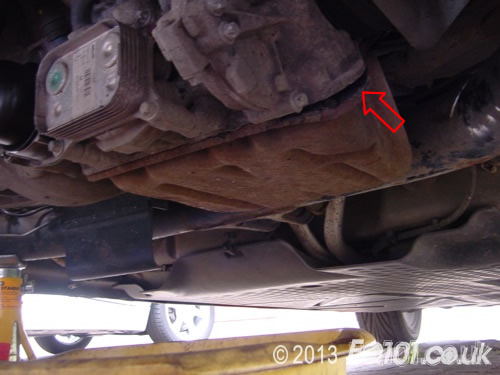
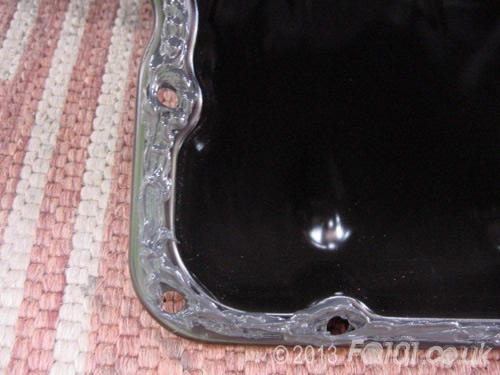
Upon closer inspection the sump had started to blister. If this was allowed to continue, it would have eventually rotted through.

A new sump can be ordered directly from smart under the following part number: A160 014 0002
To begin with, drain the oil using a suitable extractor. A good time to perform this replacement is during a routine service. Chock the front wheels, jack up the rear of the car and secure with axle stands.
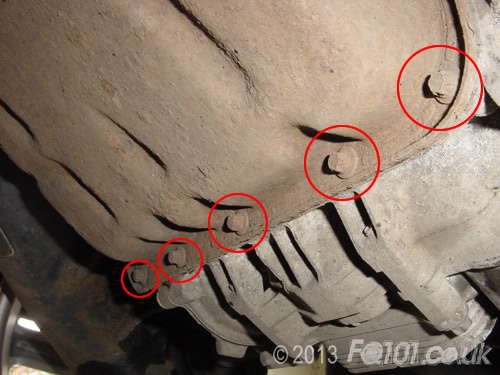
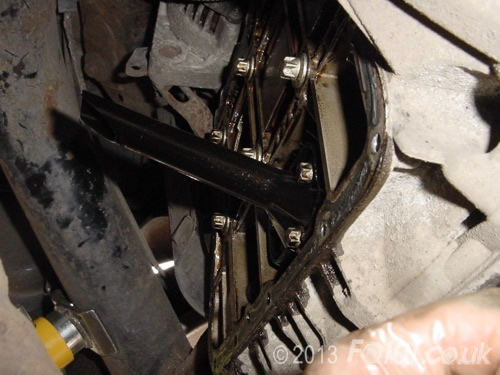
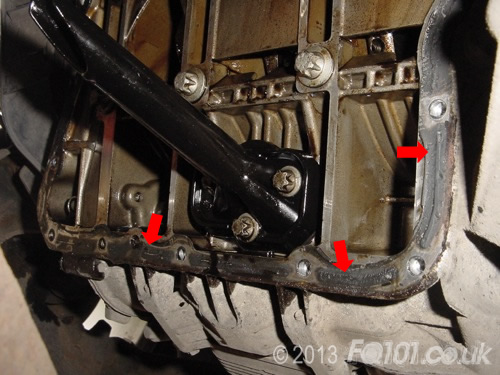
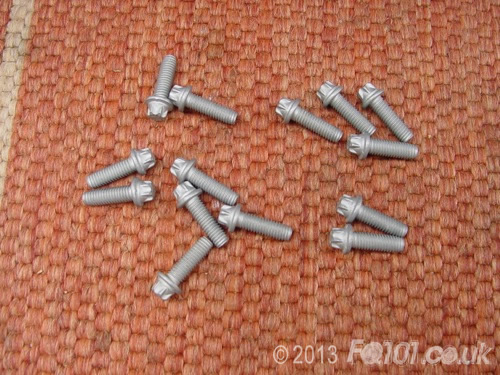
The sump is secured with 14x E8 bolts. Five of them can be found along the bottom edge with the remaining along the top edge and sides. You may note that the bolts have corroded badly as well. If they have, be careful not to round the heads when you remove them. Badly corroded bolts mst be replaced when refitting.
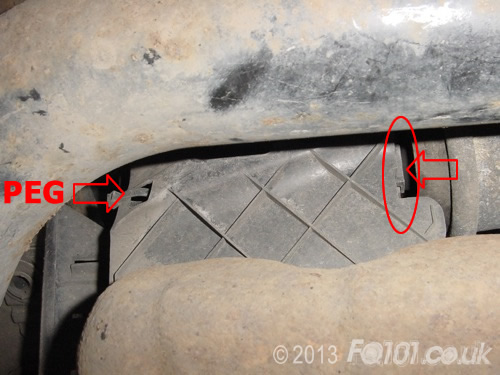
Remove the alternator guard in order to access the top bolts. To remove the guard, push it in the direction of the right arrown in order to unclip it. You then need to lower it and slide it to the right. There will be a peg on the alternator guard which needs to slide out of the alternator tensioer arm.
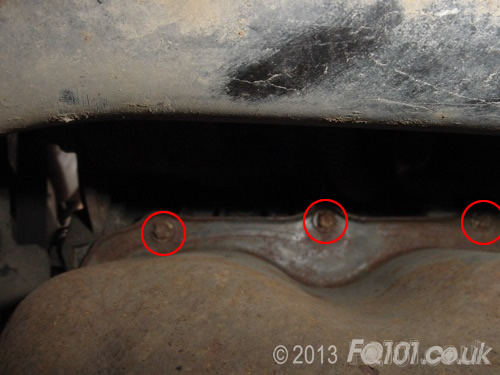
Removing the guard will now give you access to the remaining bolts.
With all the bolts removed, the sump will remain stuck to the engine by a gasket seal.
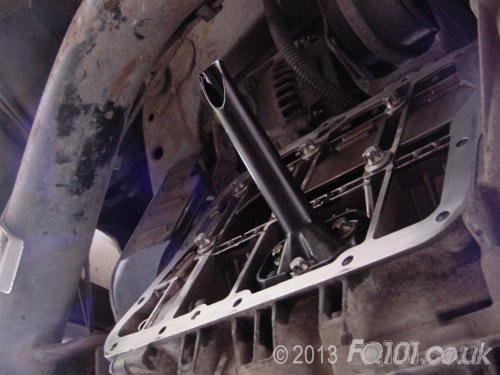
If you can't pull the sump free, you will need to carefully prise it away from the block. We recommend using the corner indicated by the arrow. If you accidently damage the block, you will only be damaging the timing case and not the lower section of the engine.
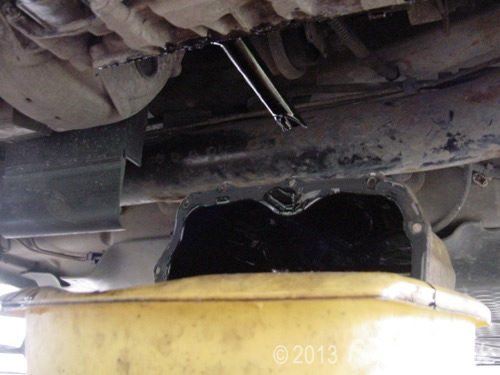
As the sump comes away, you will need to ensure that a suitable container is placed underneath to catch the remaining oil within the sump and the oil which will drip from the working parts of the engine.
As you lower the sump, be careful not to damage the oil pickup pipe which you can see in the middle of the image below.
Leave the remaining oil to drain freely.
Before refitting the new sump, you will need to remove the old gasket sealant which will be present on the mounting face of the engine block. We recommend carefully using a blade (craft knife or similar) to cut the sealant off the face. If done correctly, this will leave a nice neat finish.
If you use a blade BE CAREFUL not to damage the belt which will be on the left hand side as you face the underside of the engine. You will see that this is VERY close.
Give the mounting face a final clean with some fine grade sandpaper (e.g. wet and dry).
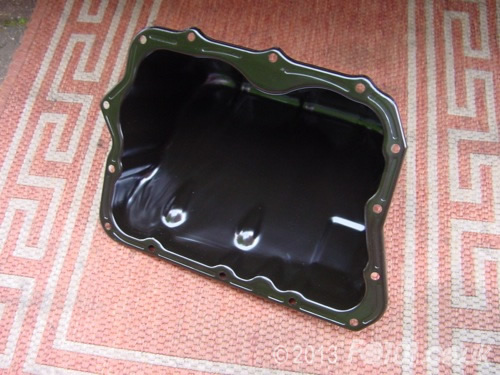
Take your new sump and prepare the mounting face by degreasing it with suitable cleaner. If you want to enhance its life, you may want to consider painting the outer body of the sump with Hammerite or another robust paint.
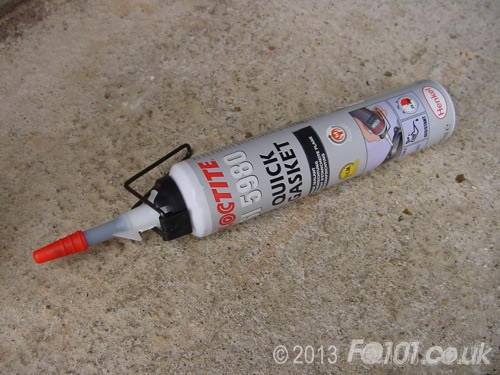
You will also need a suitable gasket sealant. If you are chosing some aftermarket gaskets, ensure that they are compatible with high temperatures and engine oil. We highly rate Loctite Quick Gasket as pictured below.
Apply a bead of sealant around all the way around the perimeter of the sump.
Ensure that the sealant goes around each hole. Don't apply too much sealant as it will squash out the sides when you tighten up the bolts. Providing there is a continuous line around the perimeter, that will be sufficient.
If you chose to fit new bolts, you will need a set of 14.
Very carefully position the sump to the engine block mounting face. Be extremely careful not to catch any of the sealant on other components as this may reduce its effectiveness.
With the sump in place, fit the bolts by hand. Once all are in place, tighten them to 12Nm for new bolts or 9Nm if reusing the old ones.
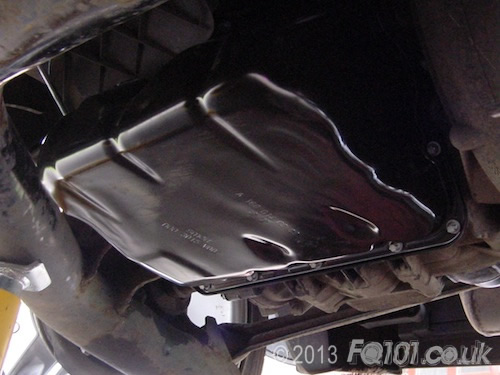
Refit the alternator belt guard to complete the installation.