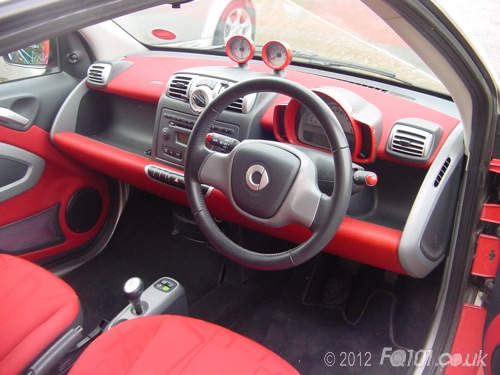
This guide is specifically for a 2007-2010 (451 pre-facelift) and takes you through the process of completely removing your dash. The order we have chosen is the easiest and there are some shortcuts that you can take if you only want to access certain areas.The guide will explain these as we go along.
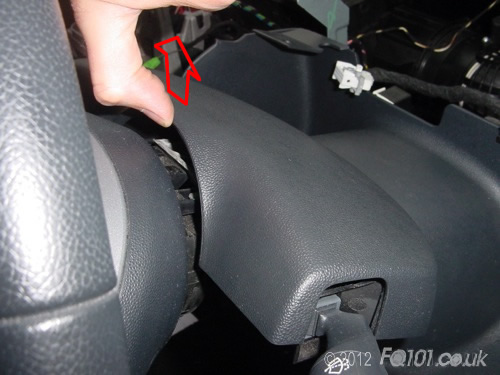
1. Instrument Cluster
Start by removing the instrument cluster. If you indend removing the top section of the dash (the red fabric bit you can see), this needs to be removed. Otherwise it can remain.
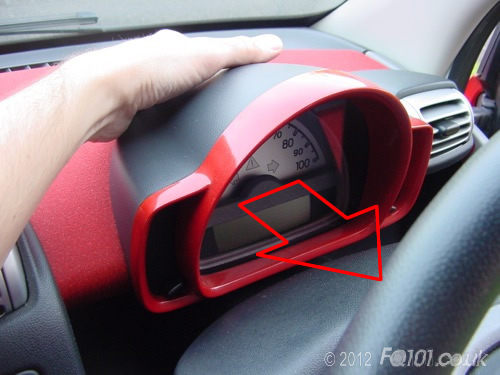
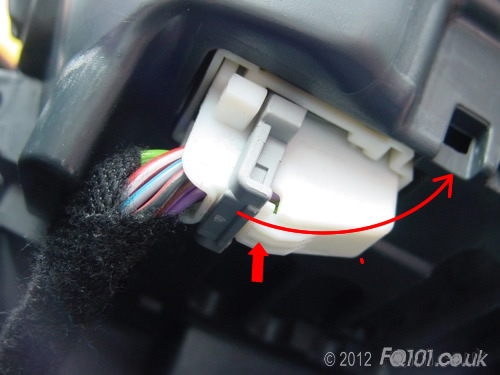
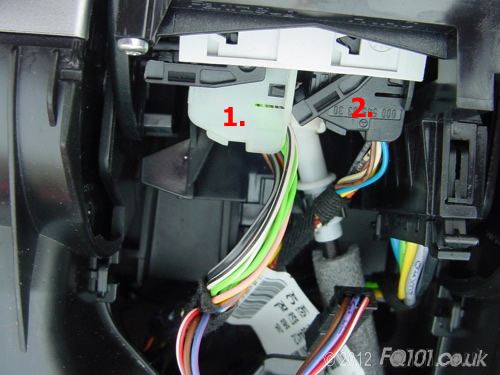
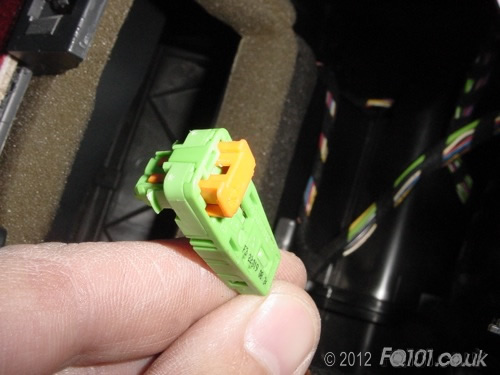
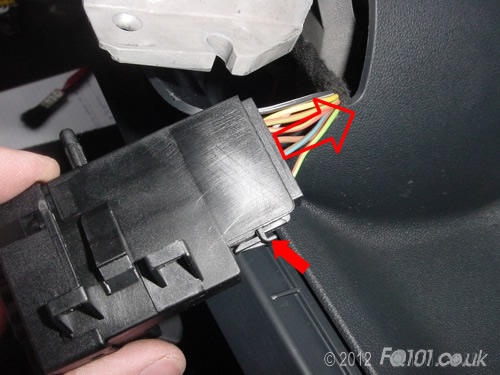
The instrument cluster is connected with a single loom as indicated below:
Free the connector by swinging down the grey latch in the direction shown whilst pressing the white bit (thick arrow).
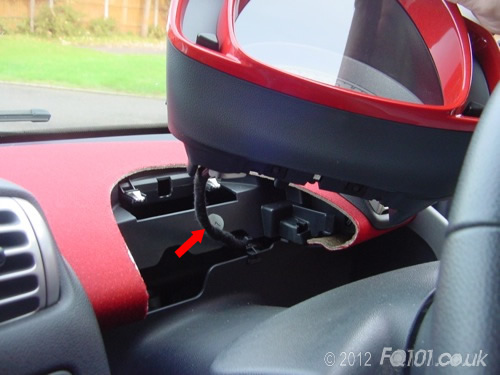
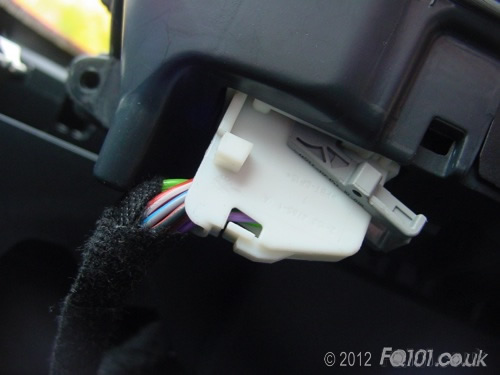
Once the latch is fully disengaged, the conector will come away from the instrument cluster. Remove the cluster from the car.
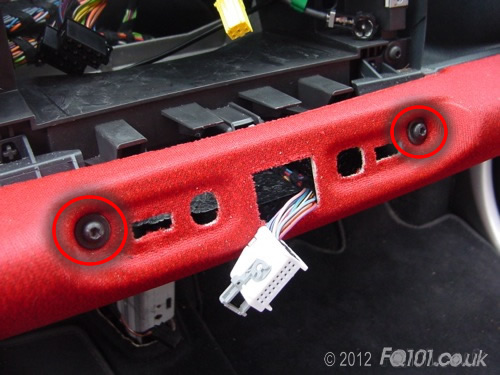
2. Centre Console
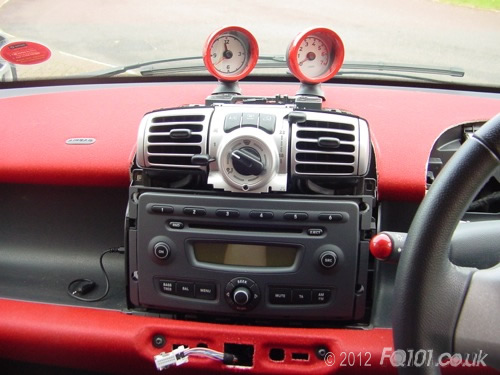
You will need to remove this if you want to remove the top section of the dash, pods, radio, air conditioning system and glovebox.
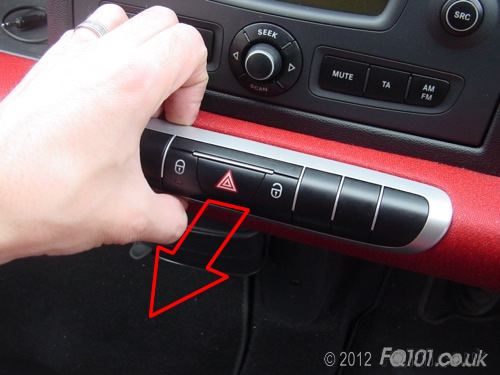
Start by removing the button strip. There are two metal sping clips holding it in place which can be released by carefully pulling the strip as shown.
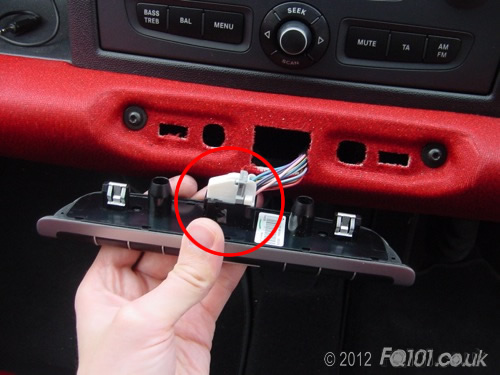
On the back of the strip is another latching connector which can be released in the same way as for the instrument cluster.
Behind the button strip is a single T25 screw which needs to be remvoed. Be careful when you do this as the screw can easily fall down inside.
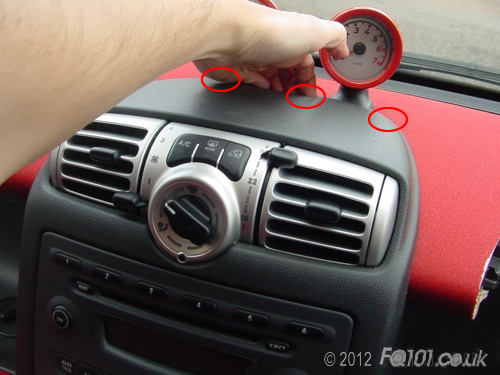
There are more spring clips to release on the top of the trim and are circled as shown. To do this, you need to reach underneath the trim and pull upwards. This can be awkward especially if you have pods.
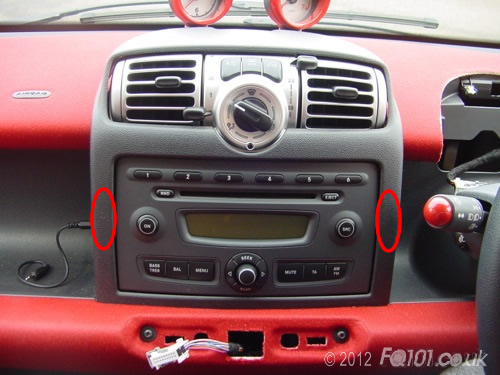
Once the top section is uncliped, the trim will start to come forward. There are two more clips either side of the radio as follows:
With all clips released, the trim will come forward and unhook from beneath the radio.

Remove the trim from the car.
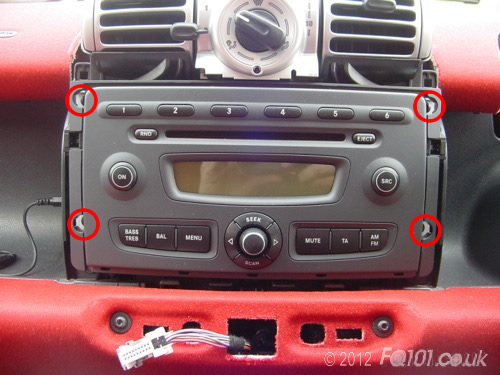
3. Remove Radio
The radio is held in place with 4No. T25 screws as shown below:
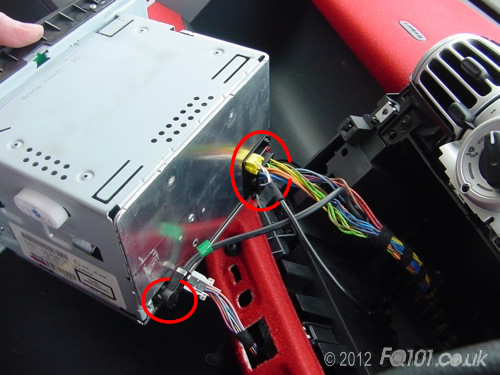
The radio has no code, so you can unplug the power cable without worrying. Remove all connectors including: aerial, mp3/aux lead and both ISO connectors. The radio can now be removed from the car.
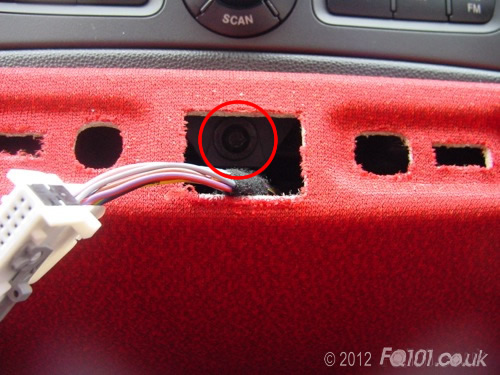
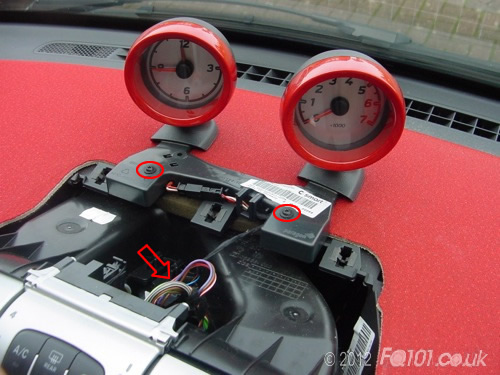
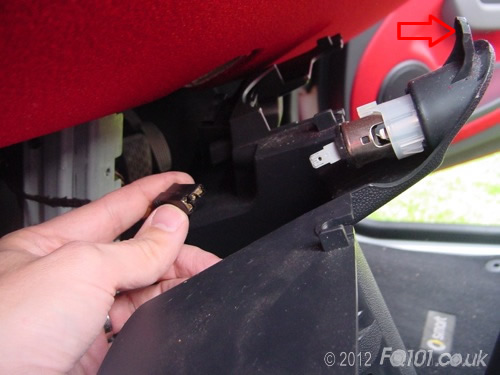
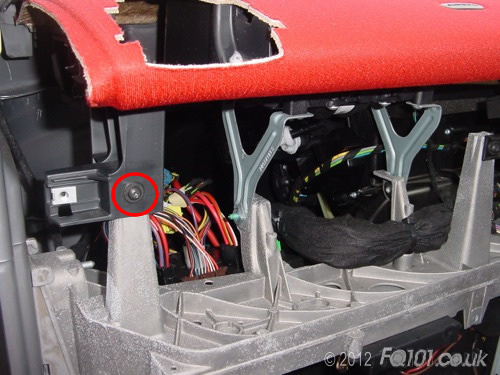
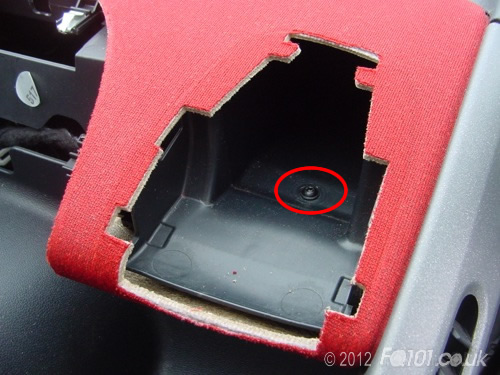
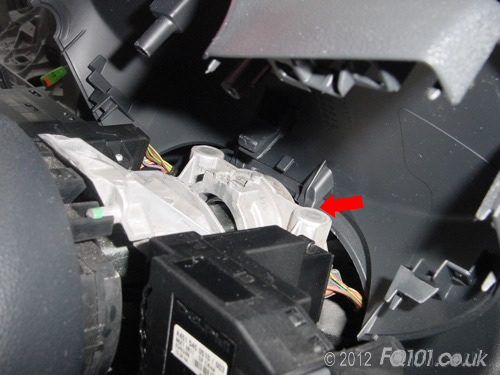
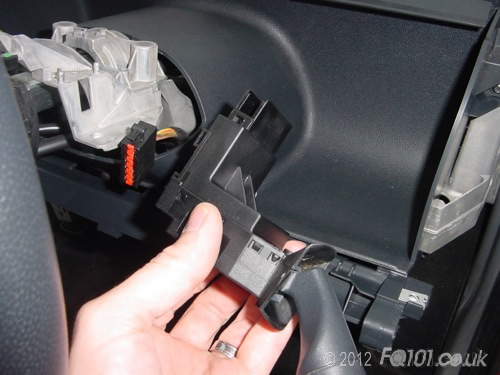
4. Removing the Pods
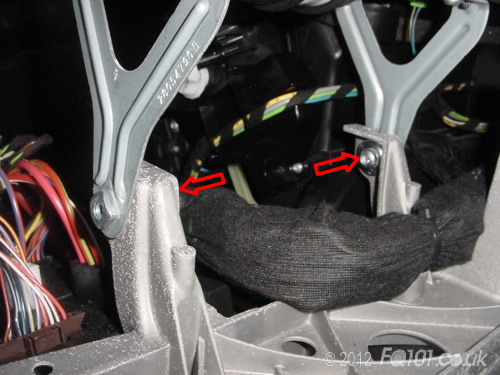
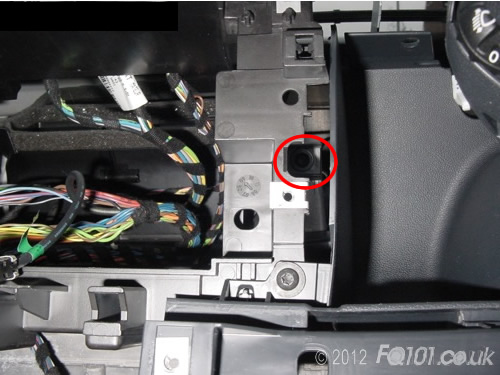
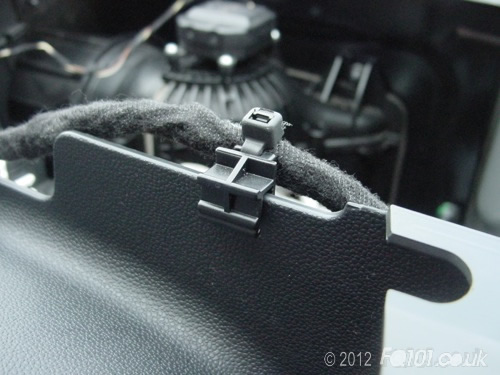
The pods are mounted to a common base plate which is held in place using 2No. T10 screws circled below which need to be removed. The wiring loom connection can be found clipped down in the location indicated by the arrow.
To remove the connector, push it slightly to the right and lift up the left side. You can see the clip at the point of the arrow head.
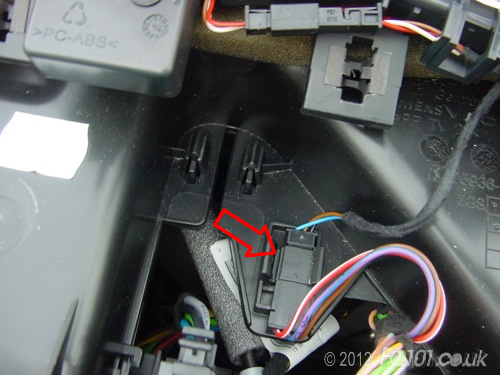
The connector will be free to come apart (you may need to give it a little twist first). Once released, the pods are free to be removed from the car.
5. Removing the side vents
You will only need to do this if you are removing the upper section of dash (the bit that they are fixed in to).
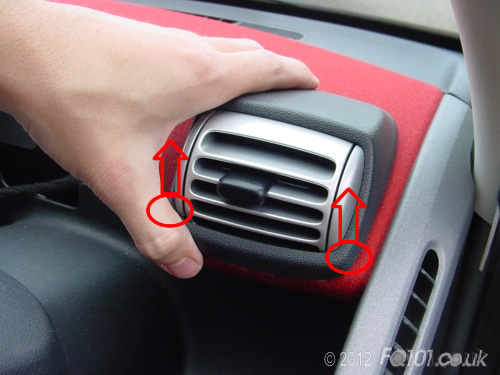
There are two metal clips holding the vents in place which can be freed by pulling the front of the vent upwards.
The back section of the vent hooks into the upper section of the dash. You can see the tab and slot in the picture below.
Repeat for the other side and remove both vents from the car.
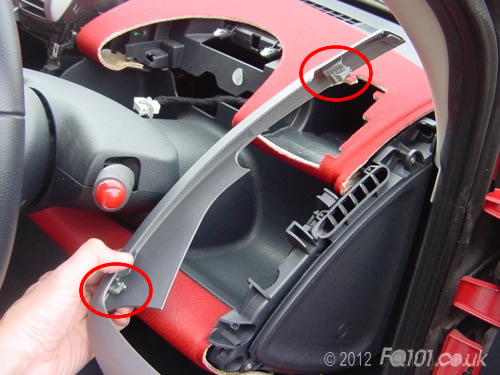
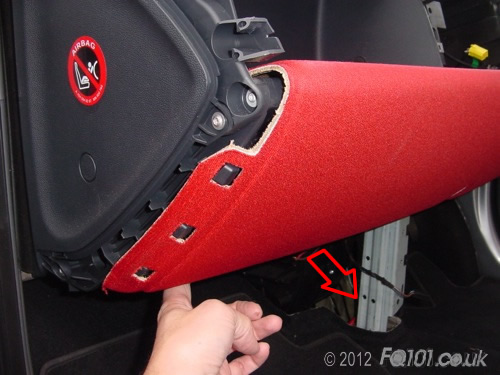
6. Removing the side trims
You will need to remove these if you intend to remove both the upper and lower sections of dash.
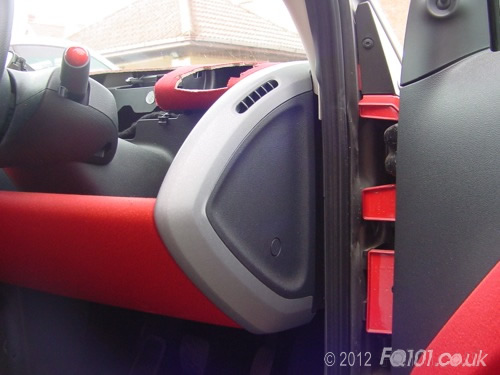
Underneath each side panel, you will see a single T20 screw holding the outer trim.
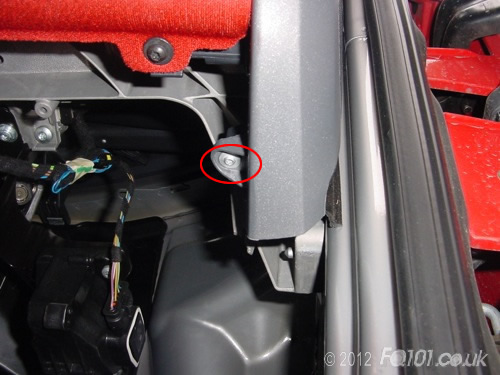
With the screw removed twist the trim slightly (curved arrow) whilst try ing to pull the trim away from the side panel. You are trying to release the small retaining clip (small arrow).
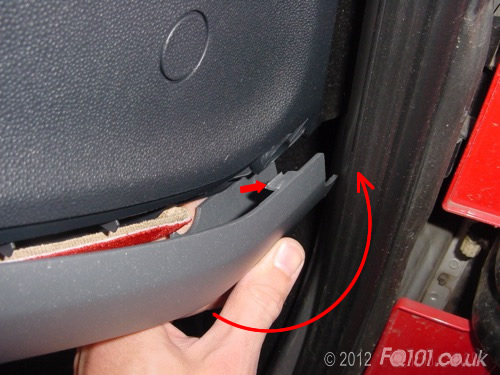
With the lower clip released, grip the trim where the arrows are and pull in their direction.
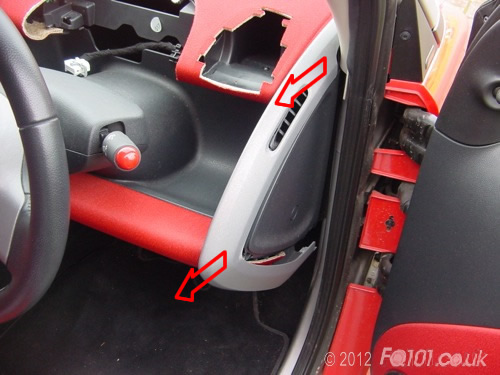
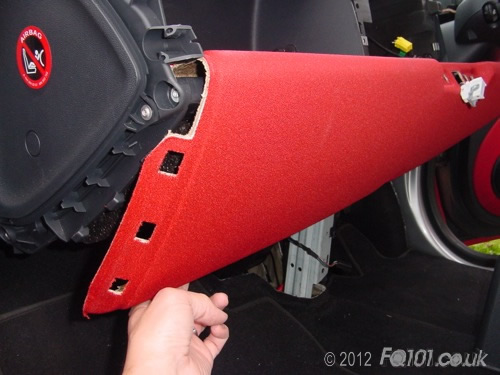
Your aim is to free the two metal clips on the back of the trim. These are pictured below once the trim has been removed.
7. Remove the lower section
Start by removing all accessories. These simply clip into place on the vertical column.
Free both T25 screws on the left side:

Repeat for the two on the right side:
To be able to remove the section, you need to free to OBD socket. Fortunately, this doesn't require a soldering iron or anything complicated!
The back of the OBD port is held in place with a C-shaped clip. Put your finger on the plastic catch indicated at the point of the arrow head. Pull this towards the camera until it stops.
The OBD socket will now fall through the opening.
The lower section can now be pulled away from the bottom. Be careful as the top hooks into the lower knee panel (circled).
As you pull the trim forward, you will reveal the wiring to the back of the cigarette lighter.
Remove the connector and this will give you a bit more space to un hook the top of the trim.
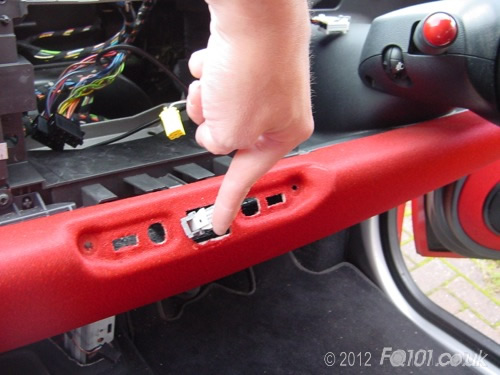
8. Remove the lower knee panel
This is held in place with 8No. T25 screws. There are two in the middle behind where the button strip fits:
Two more can be found on the top at either end:
Underneath, there are 4No. screws which all need removing:
Once all the screws are free, the trim will pull down as shown.
Feed the wiring for the centre button strip through the hole.
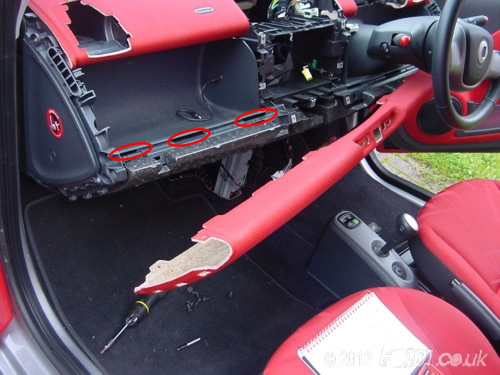
The top of the trim needs to be unhooked from the plastic section. You can see three holes which have been circled on the passenger side. There are also three holes under the steering wheel as well.
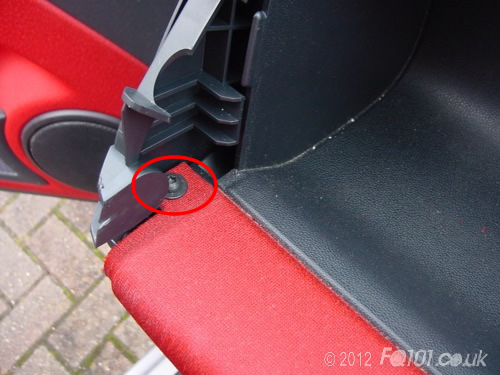
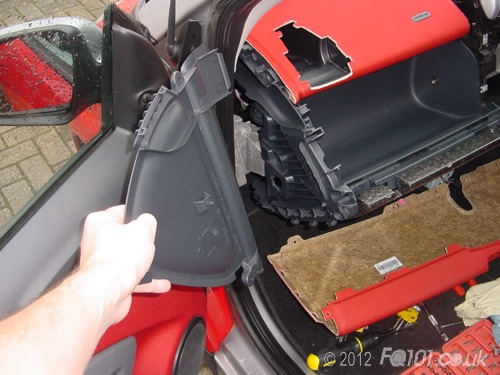
9. Removing the end panels
The end panels are made up of two sections. Start by freeing the 3No. T20 screws circled below. For reference, these 3 screws are the shiner of the two sets.
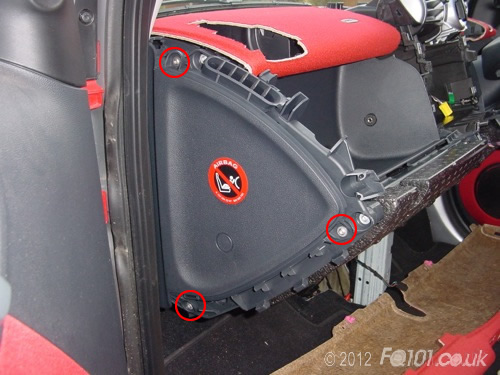
With the screws freed, unclip the panel from the top vent lugs as indicated below:

The panel will be free.
There are 3 more T20 screws holding the innner panel in place. The previous 3 screws were shiner; these screws have a more matt finish.
Once removed, the panel will come away easily.
10. Removing the polystyrene:
With the lower knee panel and the end panels removed, you can easily remove the polystyrene padding by pushing it down as shown:
It will unhook from the bottom.
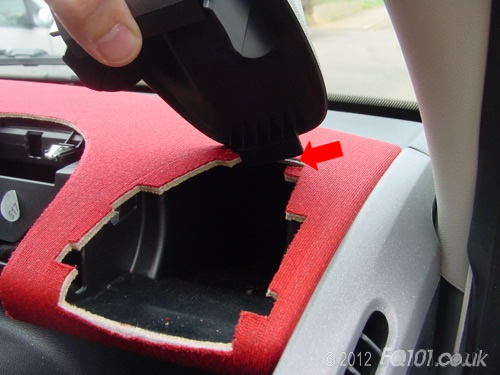
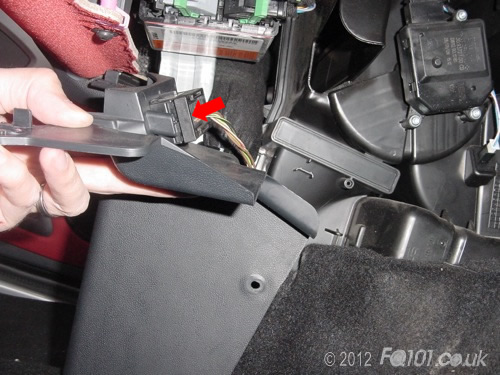
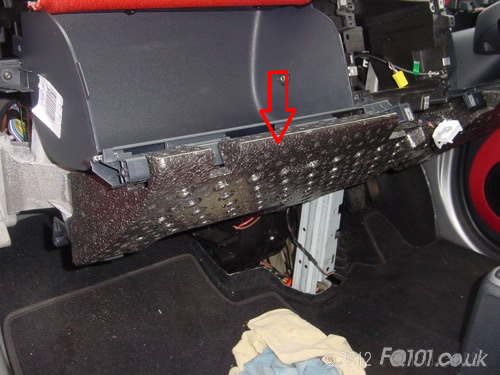
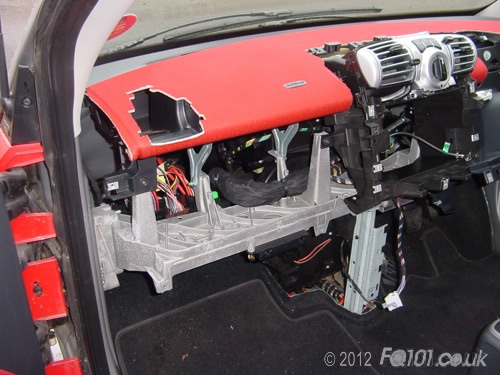
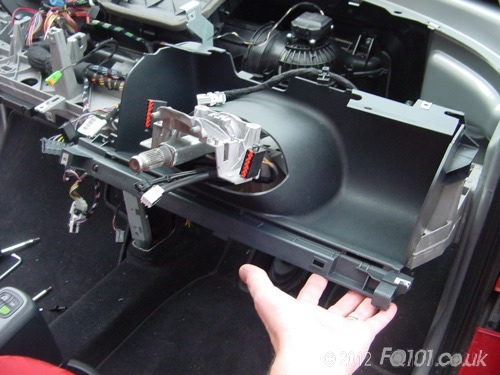
11. Removing the glovebox / passenger shelf
Note: You must have completed the above steps to do this.
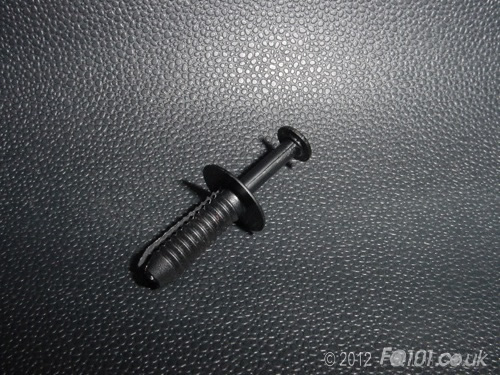
Along the top edge, you will see two black split rivets.
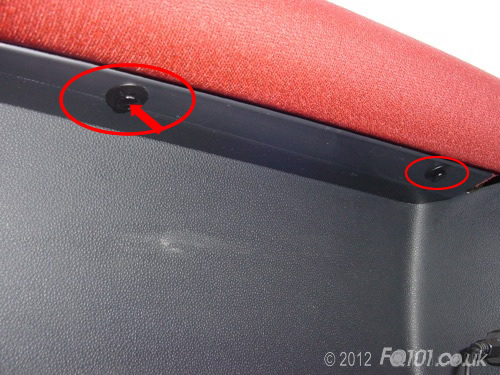
Pull the centre pin down as shown.
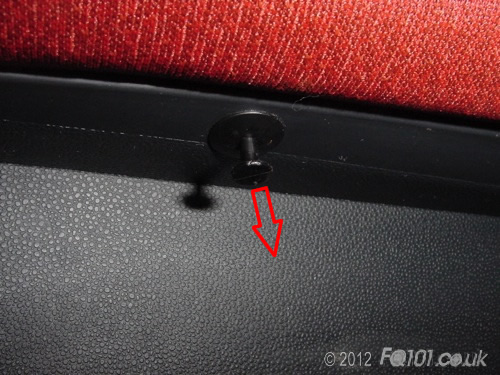
With the pin out by approximately 15mm, wiggle it to free the base of the rivet.
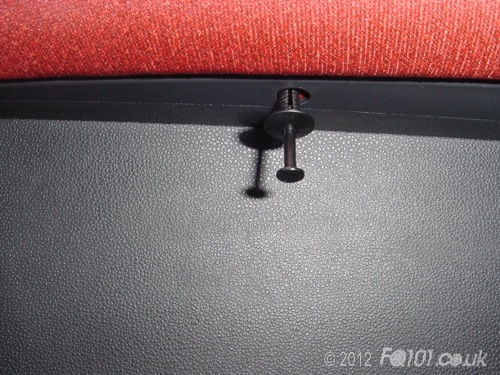
These should come free fairly easily without causing them too much damage.
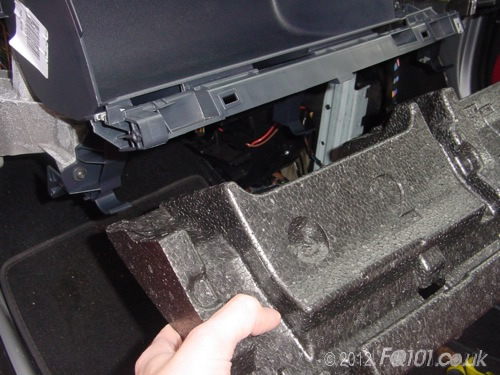
There are now 4No. T25 screws holding the glovebox / passenger trim in place. Remove all of these screws.

The glovebox / shelf will now be free.

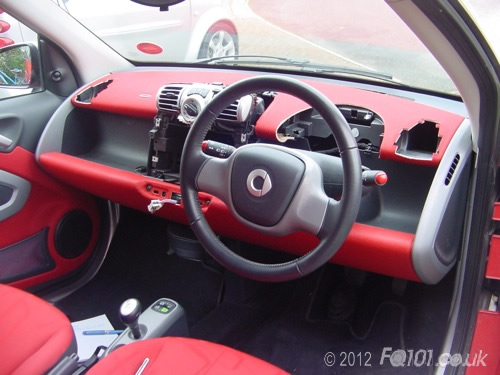
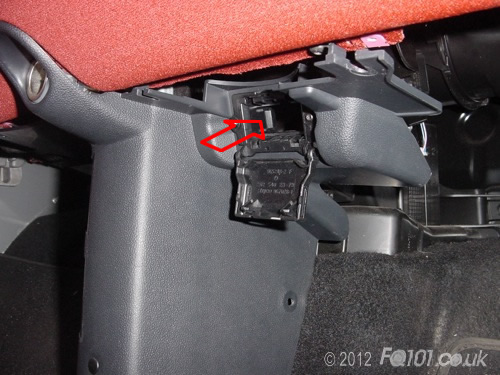
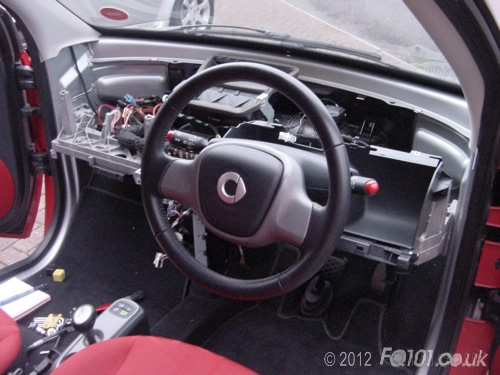
This should be where you are at:
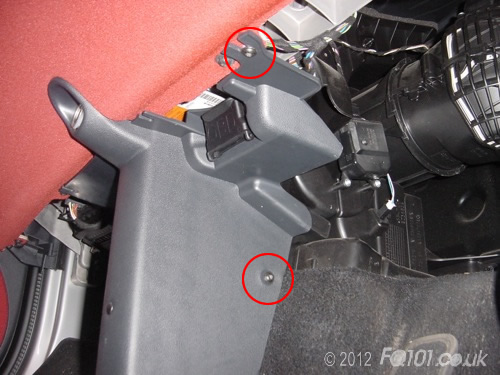
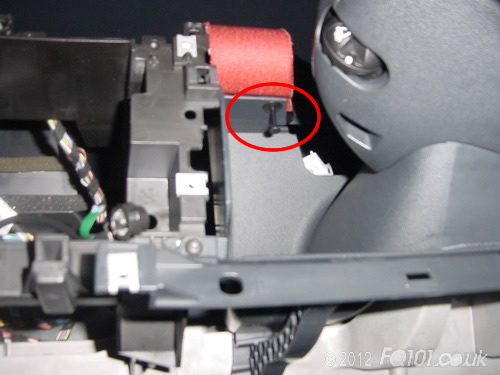
12. Removing the environmental control unit
The centre section (and controller) is held in place with 2No. T10 screws which need removing.

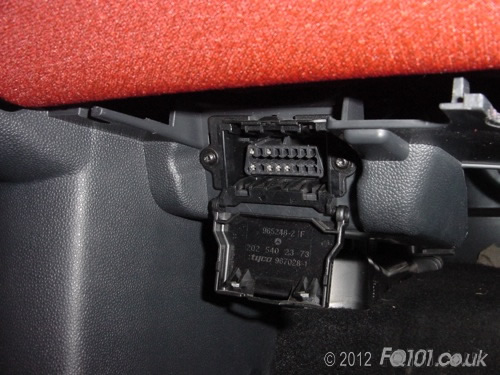
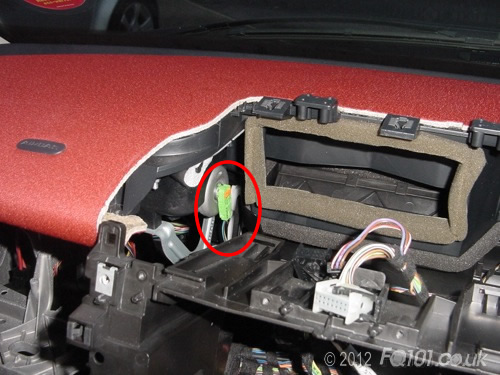
With these free, you can pull the unit forward and access the wiring at the back.

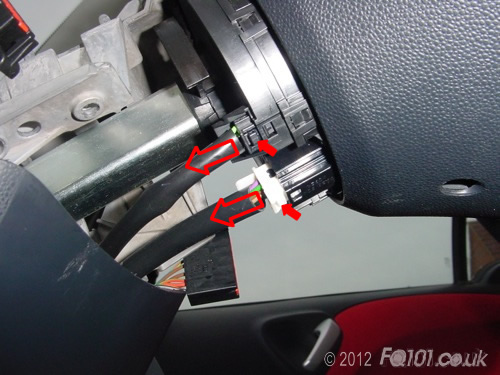
There are 3No. wiring connectors which need removing. Two of these are the same as the instrument cluster connector. The other is a flat connector which will be removed later.
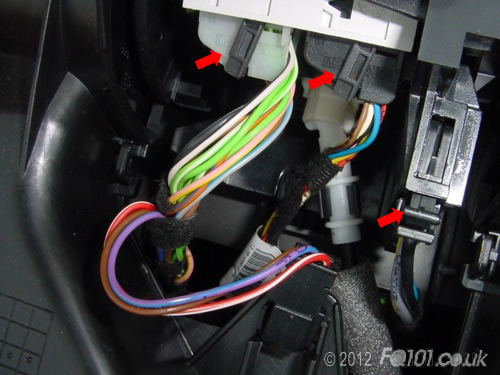
Due to space constraints, you need to remove the white connector first.
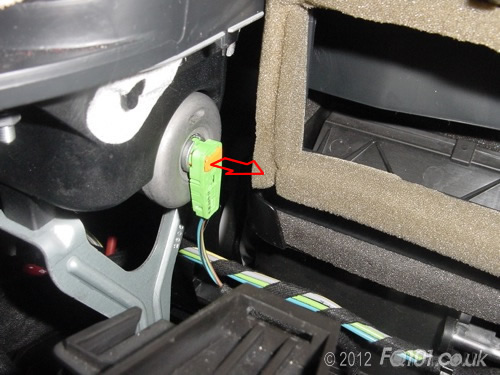
With the wiring removed, you need to dettach the air direction contol cable. With the glovebox removed, this is more straightforward.
Rotate the direction switch on the control unit until you can see the black clip (small arrow) below. This needs to be pressed and the white section will part from the black.
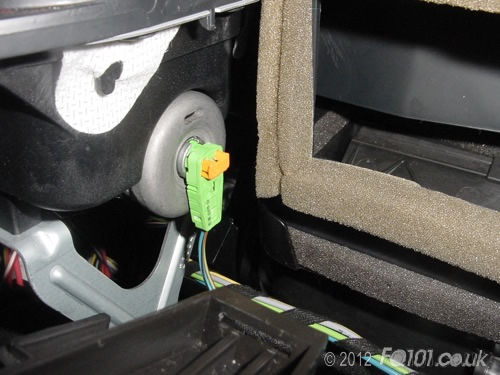
With the direction cable released, there is now enough slack to remove the long black connector. This needs to be squeezed at either end in order to remove.
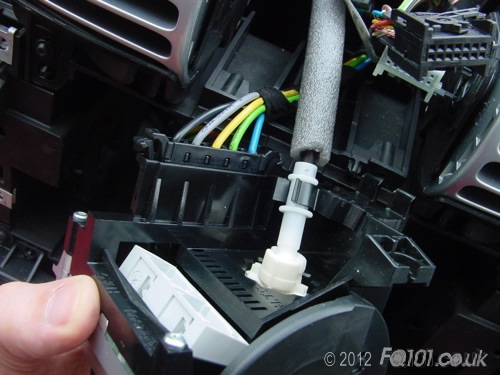
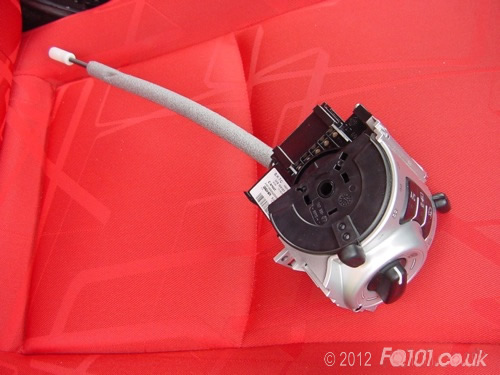
The control unit is now free.
Continue to remove the centre vents by removing the two T10 screws which hold them in place:
These will now be free.
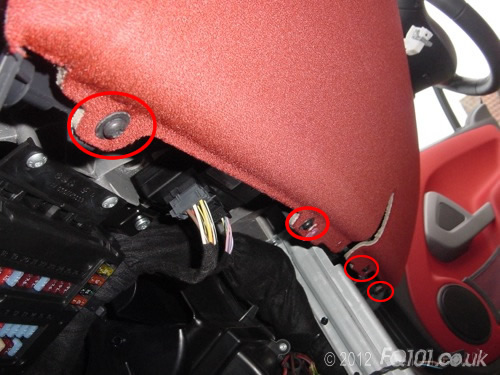
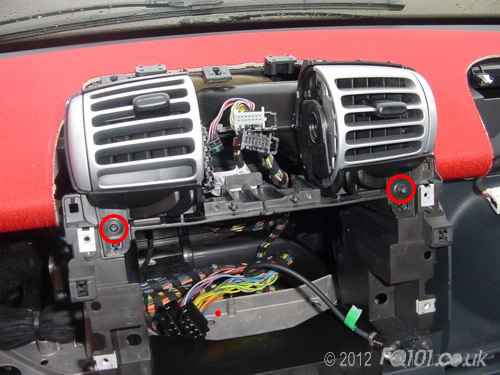
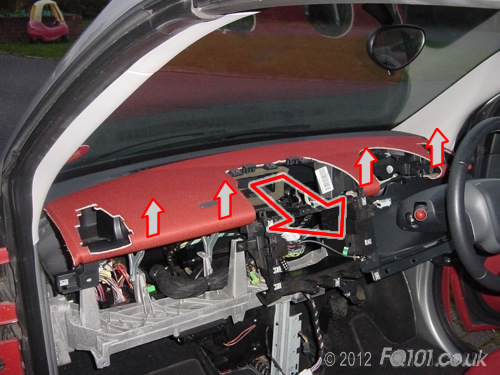
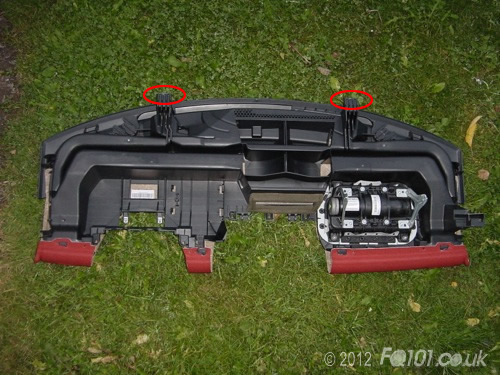
13. Removing the upper section of dash
All of the above steps need to be completed prior to being able to remove the top section.

Remove the T25 screw on the passenger side:
Remove the T25 screw within the vent void on the driver's side:
On the passenger side, remove the 2No T30 bolts which attach to the base of the airbag frame:
There is one split rivet to the right of the steering where which needs to be removed in the same way as for the glovebox.
There is also another on the left hand side of the wheel:
The final thing to remove is the connector to the airbag. Providing you do not turn the ignition on, you can do this with the battery connected.
In the middle of the connector, there is is a small orange locking clip. This needs to be levered out with a small flat bladed screwdriver.
Pull it out carefully as far as it will go:
The connector will now pull free from the passenger airbag.
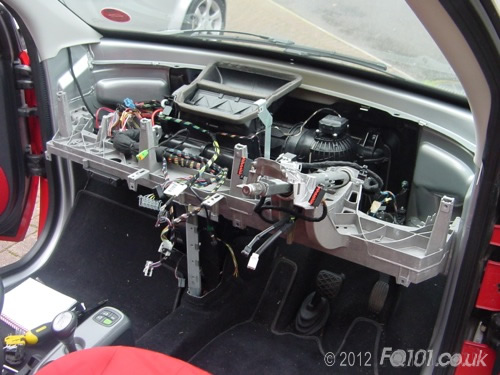
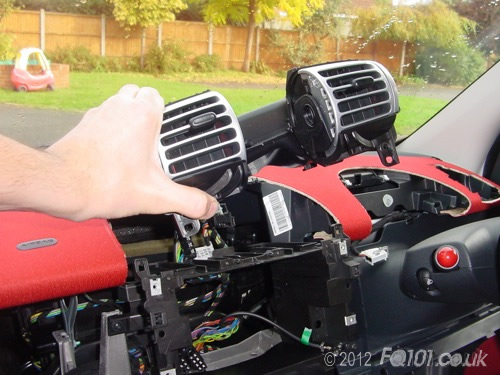
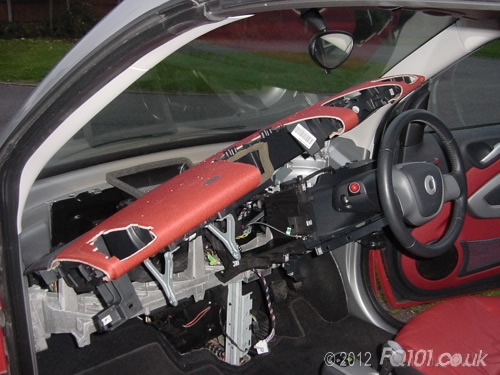
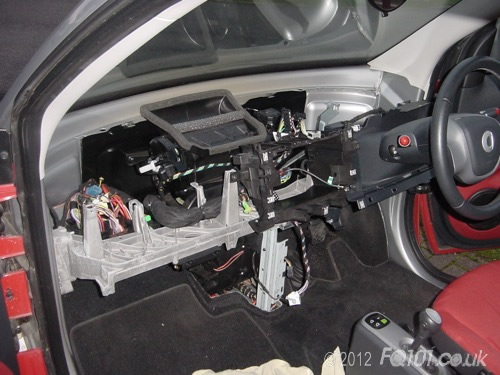
The dash is now free to remove.
Lift up the front edge slightly (about 5-10cm) and pull in the cirection of the big arrow. You will feel two clips release at the back.
The dash is now free to remove from the car. Be careful that the airbag supporting brackets don't scratch any of the remaining trim.
These are the clips which hold the back of the dash trim into place. When refitting the dash section, you can locate these by reaching underneath and guiding the dash into place.
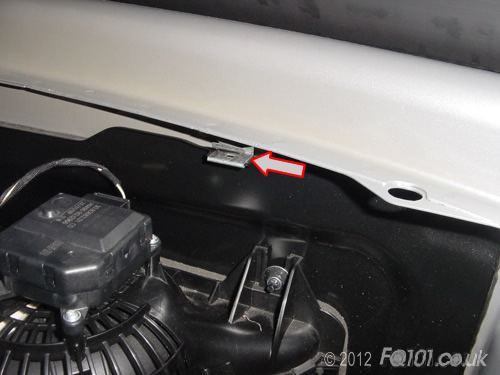
Each of the brackets circled locate into each cof the clips above.
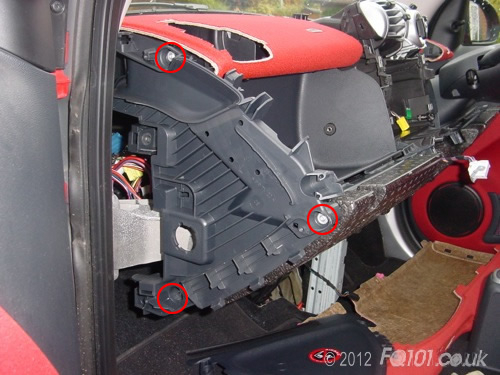
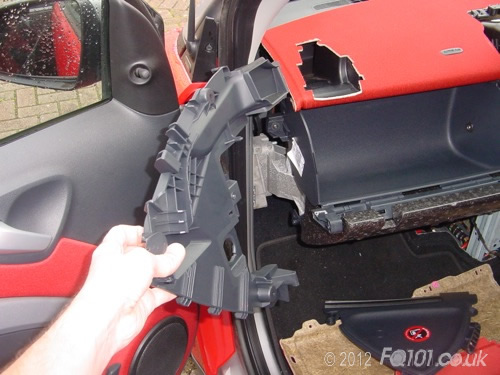
14. Removing the centre frame
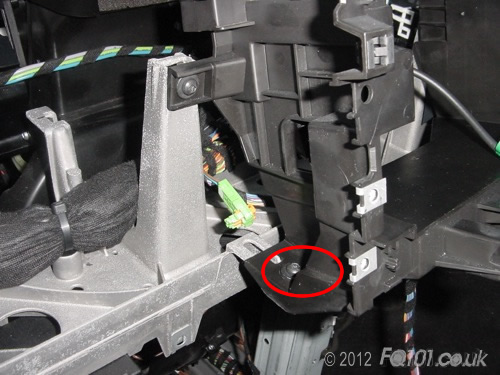
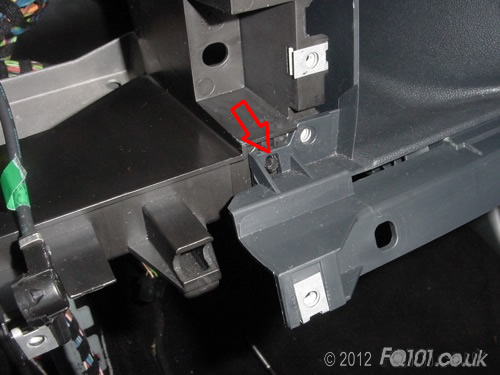
There are 6No. T25 screws holding this section in place. Although not directly holding the frame in place, the 7th screw (circled in blue) needs to be slackened off to create clearance.
The first 3 screws for removal are circled in red:
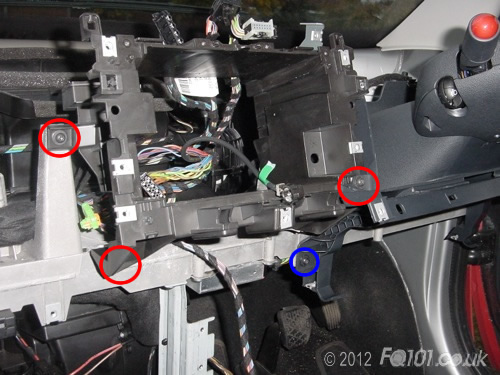
There are two screws either side which hold the frame down to the aluminium structure:
The final screw is tricky to get to as it is next to the driver's trim.
To remove the centre trim, you need to unhook the driver's trim first. This is why you need to slacken off the screw circled in blue above.
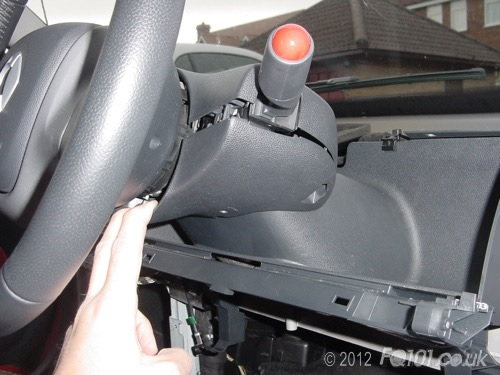
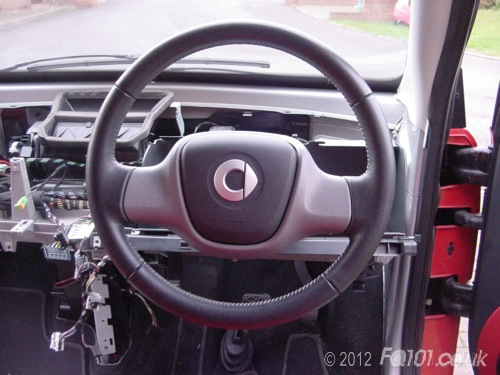
Without removing the steering wheel, this is as far as you can go with the teardown.
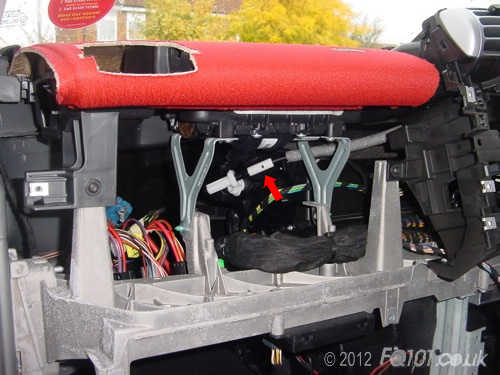
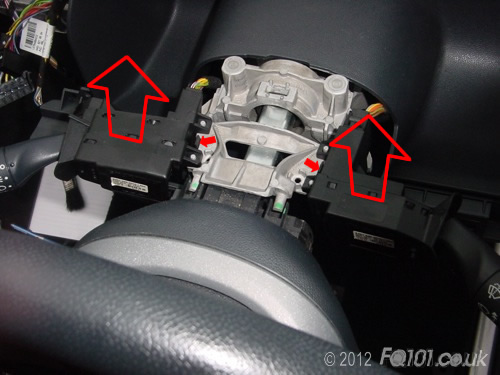
15. Steering column trim removal
To access / remove the control stalks, start with pulling the lower section of trim as shown. The front clips will release. These may need some slight persuasion!
As the lower section of trim comes away, it will hold on with two hooks circled below.

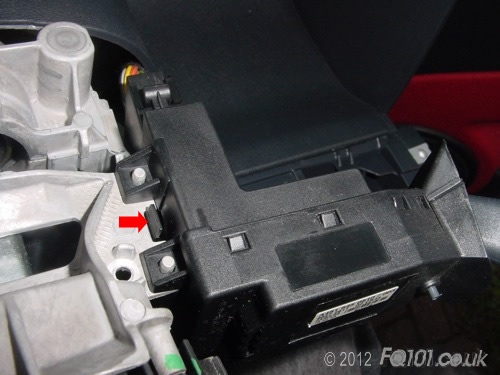
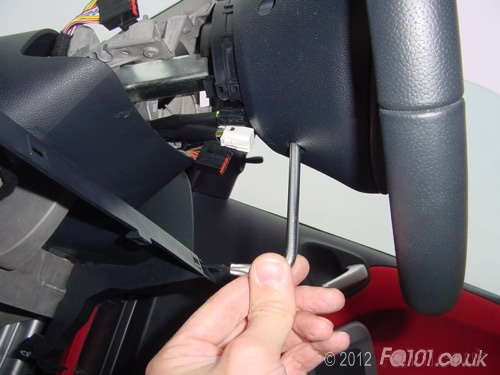
The top section of trim is held in place with 2No. T10 screws which can be accessed from underneath. With these free, pull the trim upwards as shown:
As the trim comes away, note that it will be hooked at the back:
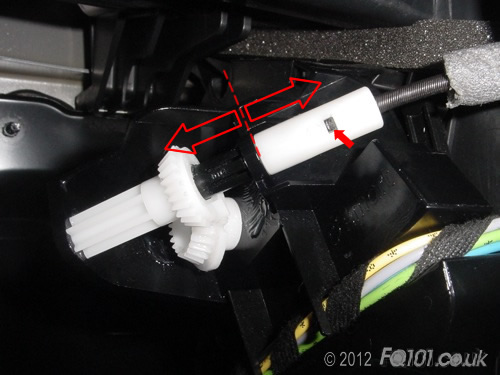
Press the little tab as shown and pull the stalk upwards. It will come away from the steering column frame.
Here is a close up of the tab:
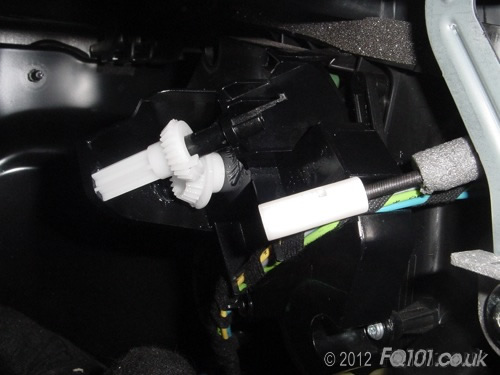
Remove the wiring as shown:
The stalks will now come away.
16. Steering Wheel Removal
Double check that the car is switched off and the key removed before continuing to the next step!
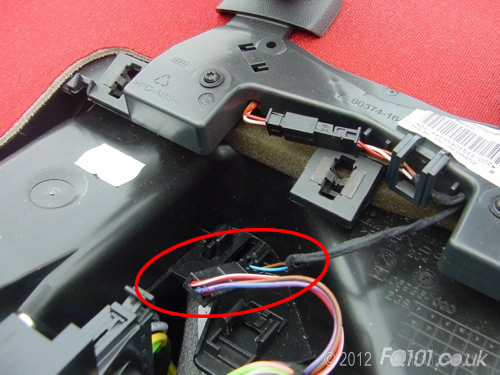
Carefully remove both wiring looms from the back of the wheel. You will need to press the buttons indicated with the small arrow in order to release them. Contrary to popular belief, you don't need to disconnect the battery to prevent an airbag fault. Just keep the car turned off!
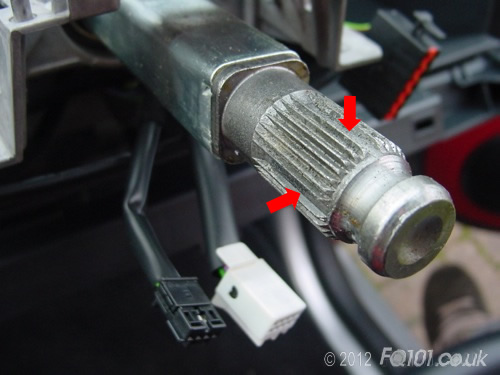
Use a long reach T40 bit to loosen the retaining bolt. Keep loosening this until you reach some resistance. This will take quite a few turns.
Keeping the wheel completely straight, grip the wheel firmly at 9 and 3 o'clock positions and pull. You may need to gently wiggle it to slide it off the steering column.
With the wheel removed, take great care NOT to rotate the inner black cartridge as this can damage the clock sping contact that handles the electrical functions within the wheel.
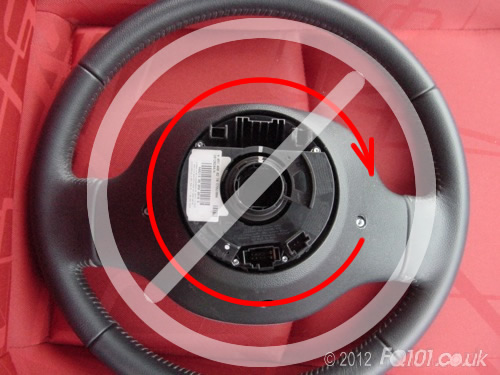
Note that there are some splines missing. These act as a keyway and help to correctly realign the steering when when refitting. This particular 451 had missing splines at 12, 3, 6 and 9 o'clock positions. Other models may have fewer missing splines.
Remove the 3No. Tx25 screws circled below:
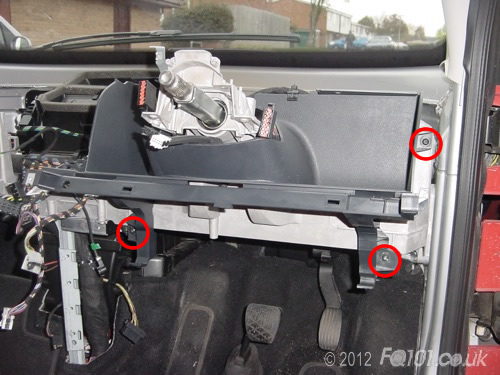
The wiring for the instrument cluster will need to be unclipped. The clamp is barbed so this may be harder than you think!
Carefully lift the trim away. The opening for the steering column is fairly tight so be careful you don't damage the connectors for the steering wheel wiring.
This completes the teardown of dash. You can now access many of the internal components and wiring with ease.